Hello Everybody, Carrie here with my first all digital Project Life layout. I used the amazing Digital version of the Practically Perfect Kit. I super LOVE this kit. Also, I think it’s worth mentioning that you can re-create this same layout using only the physical kit. The only elements not in the physical kit which I used are my photos, the font for my journaling, and a drop shadow on some of the elements (which you could replace with foam adhesive).
To begin my first layout I created a square grid in Photoshop with the amount of “pockets” you see above. This step isn’t necessary because I know you can purchased digital grids specifically for pocket page scrapbooking. Becky Higgins has an app with multiple choices, and many digital scrapbook shops such as The Lilypad also have designers that sell them.
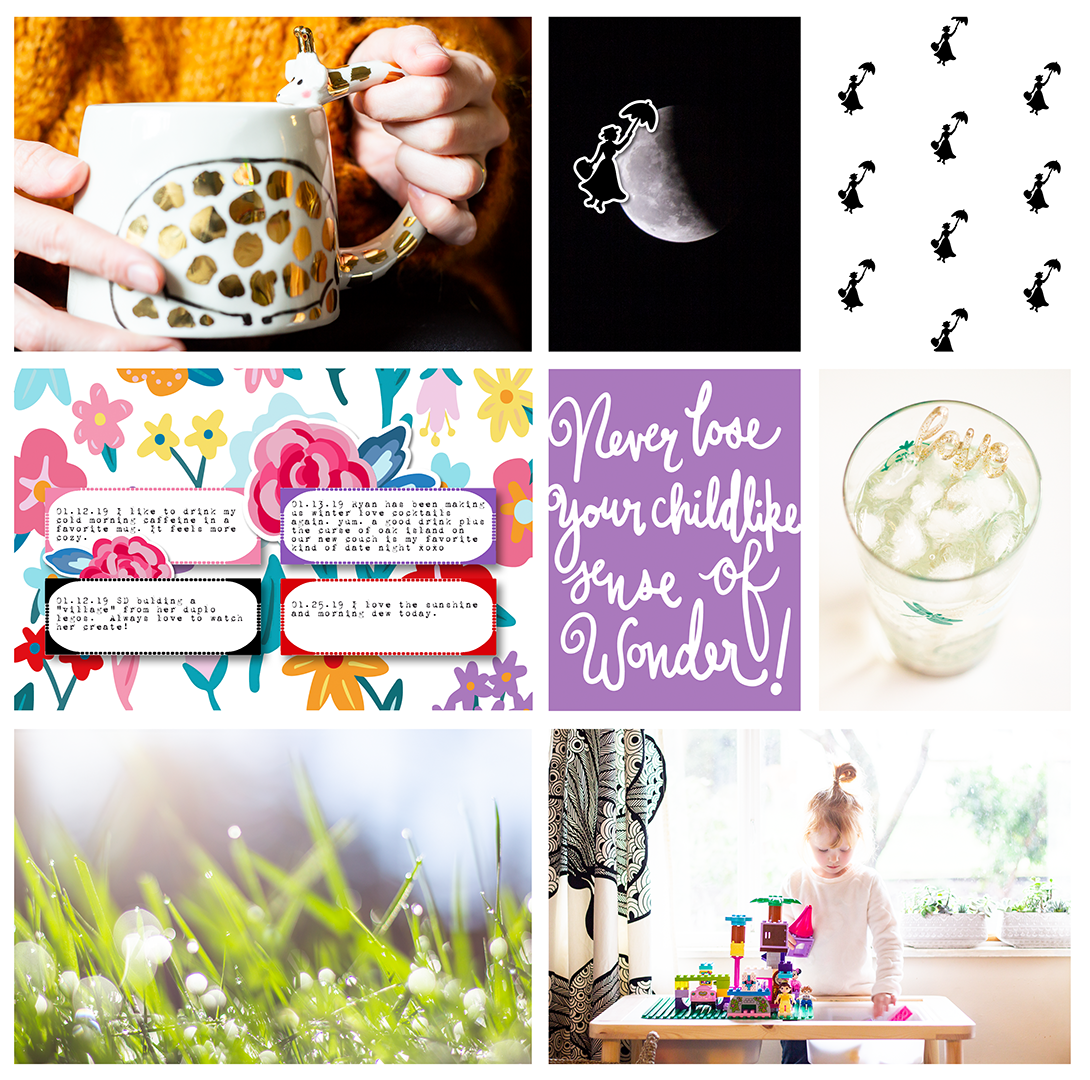
Anyways, once I had all my photos placed, I chose a portion of the gorgeous 12x12 inch floral patterned paper to fill the 4x6 inch pocket on the left. I knew I wanted my journaling to go there so I added the 4 rectangle journaling spots from the stationery pack and centered them all together. Since my journaling needed a bit more space, I decided to enlarge them all as well as stretch them a bit taller. I used a free font called “1942 report” and added my journaling in each of the rectangles. To give the rectangle journal spots a bit more depth I added a slight drop shadow to each. To finish off this card I added two of the pink flowers from the ephemera pack, enlarging the smallest until it was the size I wanted. To add a little interest I layered them behind and over some of the journaling with the same slight drop shadow.
For the next “pocket” I chose to add the purple 3x4 inch journal card that says “Never loose your childlike sense of Wonder,” from one of the cut apart sheets. I thought this was perfect since it was just above the photo of my daughter playing. Andrea’s handwriting is so dreamy, I just love it.
At this point I knew I needed to add in more black since I had a mostly black photo to help balance, so I placed a portion of the 12x12 inch black and white patterned paper of Mary flying while holding her umbrella in the upper right 3x4 inch “pocket”. Originally I was going to add the black image of Mary with her umbrella from the ephemera pack on this card since the designs matched, but when I accidentally dropped her on the photo next to it with the moon I knew it belonged there instead. lol. I added the same slight drop shadow to her so it helped the effect of her flying over the moon…..and that’s it for this layout.

For my next layout I knew I wanted to highlight the photo I took of the supermoon eclipse, so I decided to do a full page photo. Above you can see the page as a square but that’s just so you can get a good look at what I added from the kit. At the top of this post you’ll see that it’s around 5 inches wide and 12 inches tall as it sits next to the previous layout.
Okay, so for this layout I chose to try out adding some of the flowers from the ephemera pack around the right and left sides of the moon. Originally I just kind of placed them where ever, and then once I thought I might actually like them I decided to go for it and created a clipping mask circle in the same size as the moon. I made sure the clipping mask circle was layered perfectly over the moon. Once I had all the flowers placed where I wanted them, I selected the clipping mask and used it’s shape to cut the excess from the flowers that overlapped the moon. This made the flowers look like they were behind the moon instead of layered over the top. As you can see I chose not to do so with the one pink flower that corresponds to the layout on the opposite page. I added the same slight drop shadow to the flowers as a final effect to make them look like they were hovering over the moon more.
The last thing I added was the text in white with the same “1942 report” font just below the moon that states the date and the type of moon it was.
The photo at the top of this post is how the 12x12 inch pocket page layout looks next to the 5x12 inch layout when I send it off to the printer. I will have it all printed together like this in the size 12x18 inches. So it will basically look the same once I have it printed, then cut the two layouts apart and place them in 12x12 and 6x12 inch page protectors inside my album. I hope that makes sense. Let me know if you have any questions, and thanks so much for taking a look at my project. See ya next time : ) Carrie