
Hello everybody! My name is Carrie Elias and I am the guest designer for this month, which means I have been playing with the Jolly kit!! Andrea and I have been friends for a while, however since having my daughter a couple years ago I really don't make time to scrapbook as much as I'd like. So when Andrea asked if I wanted to join her guest design team for December I was thrilled, and jumped at the chance to work with her lovely product!

Andrea has been doing a project called Holidaily for many years now where she documents from Thanksgiving through New Year's. I have always admired her finished albums and if you want to take a look for yourself she has shared a few of them on her personal blog. Well, I decided to join along this year so today I will be sharing December 7th of my Holidaily album!
Admittedly most of my daily scrapbook spreads have multiple photos because I have a hard time taking only one photo that seems to tell a complete story to me. It's a personal struggle LOL. Today's spread is no exception. My little girl and I had spent hours putting ornaments on our tree and enjoyed watching Babes in Toyland while doing so.

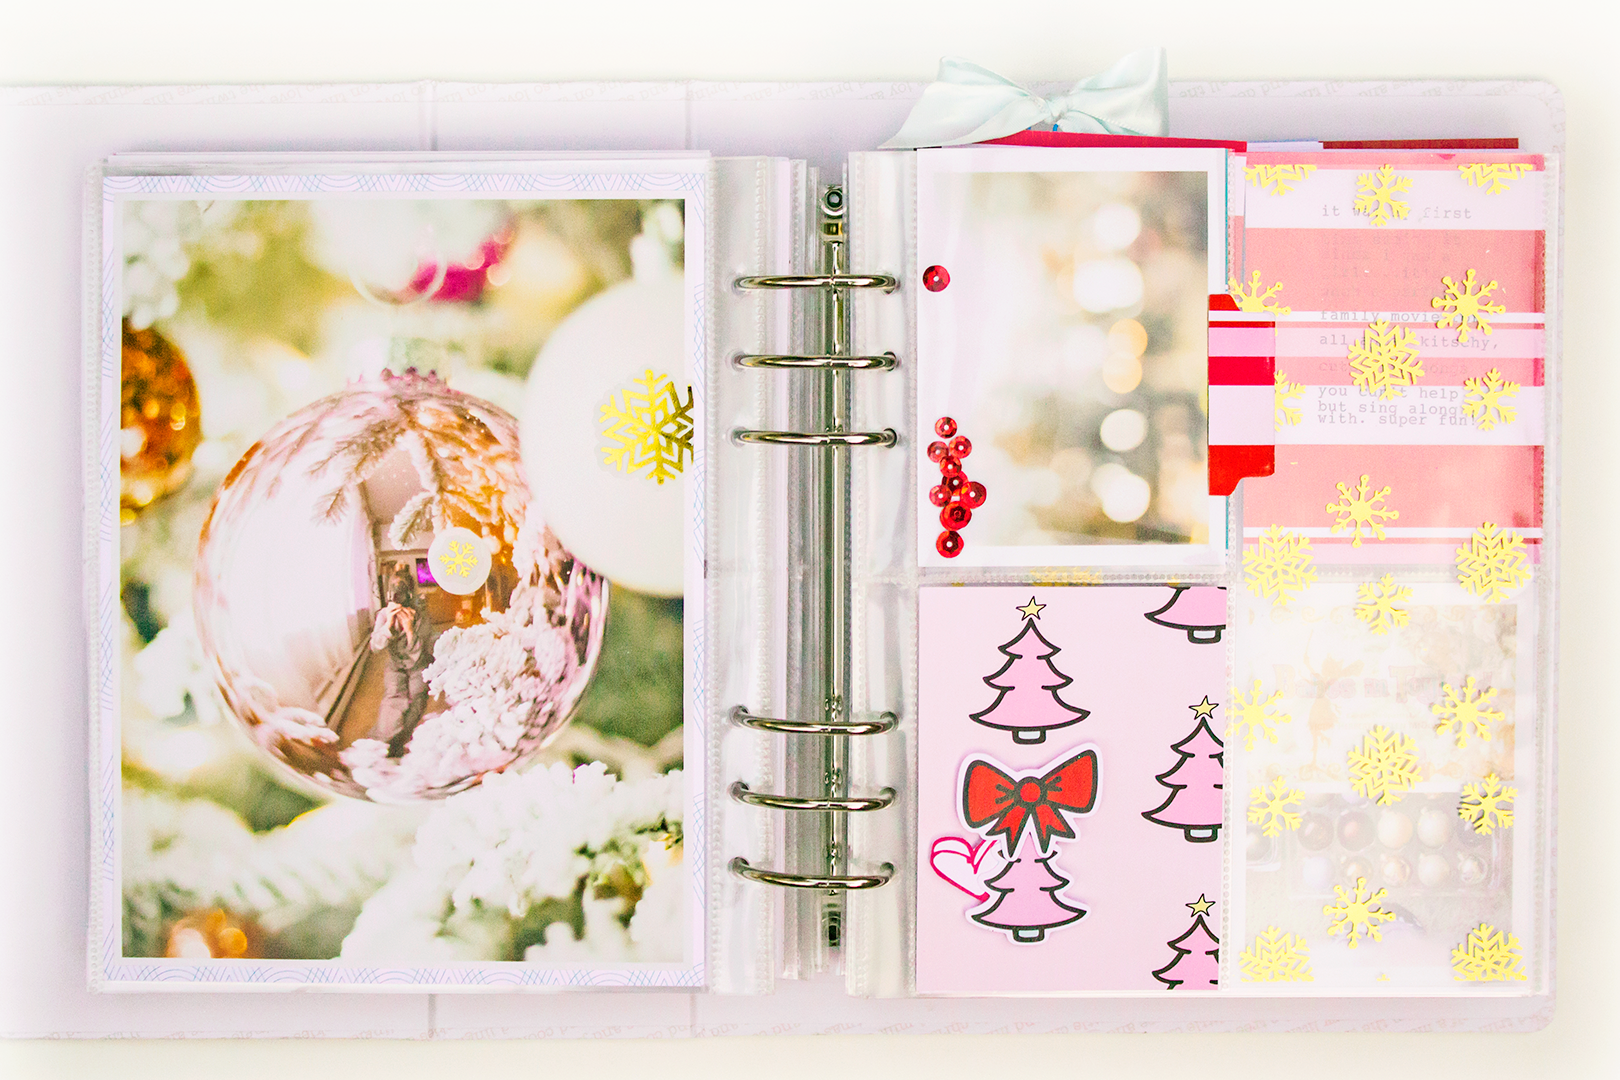
For the first page I have a full page photo with a reflection of myself in my pajamas in one of the ornaments. I accidentally had my photo printed up just a tad bit too small and decided to take advantage of it by using one of my favorite papers from the collection as a thin border. I think it helps tie this spread together that much more. The gold foil snowflake transparency is peeking through under the opposite page and so to tie it in I added two of the gold foil snowflake stickers directly on top of my photo.

Across the page is a page protector with two 3 x 4 pockets trimmed down from four. I added a tab using my We R Memory Keeper's tab punch, and the same striped paper that's peeking out from the page underneath. I purposefully lined up the papers for better flow. Also, there was a pack of sequins in my kit and I picked out a few of the red ones and placed them in the same pocket as my top photo. I thought they kind of mimicked the bokeh affect from the photo.

Since we were decorating our tree of course I had to use one of the Christmas tree papers for the pocket underneath the photo. I ended up choosing one of the planner insert papers, cutting it down to 3 by 4 and then fussy cutting a few of the other pink trees. I used one in this pocket and the other elsewhere on this spread. In order to add more red to this pocket I decided to place big red bow from the die-cut pack over the star of the popped up pink tree. I also tucked in one of the red heart die cuts.


When you turn the page and see the back of the two 3 x 4 pockets, you'll see I added an additional single sequin inside a wreath in the bottom pocket photo. In the pocket above it, I used one of the patterned papers cut down to 3 by 4 along with a glittered number 7. I knew I wanted to place the number 7 on a popped up tag and came up with the idea of using the same pattern paper to make my own tag. All I did was trace one of the tags from the die-cut pack, making sure the design on the tag and background papers matched up. Then I popped up the tag added my number 7 and a gold eyelet, finishing this pocket up with one of the pink trees I had previously fussy cut tucking it in.

Having a toddler means everything goes in a page protector at this point LOL. So I cut down the gold foil snowflake transparency to 6 by 8 and placed it in a full-page pocket. I'm a fan of full-page transparencies as both a resting place for the eye as well as adding a little extra character.

On the next page I cut one of the papers into a 4 by 6 card, and after deciding to switch to a three pocket spread cut it in half. I added journaling on the papers for both pockets and layered two additional pink trees. I could have added more embellishment to these two pockets but this spread was getting so busy I decided to keep them simple.

For the 4 by 6 photo collage at the bottom, I cut one of the airmail looking die cuts and layered it over one of the photos which ended up being a duplicate to the photo on the next page. I used some wood veneer Thickers from the Crate Paper Fa La La collection to spell out the word Fun on top.

When you turn the page there is one final two-page spread for this day. On the left is a single photo in the bottom pocket, and two 3 x 4 pockets above it. I cut down another one of my favorite papers from the collection to 4 x 6 and ran it through my typewriter to add my journaling. Then I used my paper trimmer to make two 3 by 4 cards cutting straight down the middle of my journaling so it reads left to right across both pockets. Next, I used the same wood veneer thickers to spell out the word Happy.

The thickers made the pocket so thick that the card on the right kept popping up out of the pocket. So, I used the bow paperclip from my Jolly kit to attach it to the front of the page protector. Now it stays in place just fine. To finish off this spread I added the same pattern paper from the 3 by 4 cards and layered it behind my full page photo.
And I think that's it for today's spread. I'll see you again next week for more from my Holidaily!
Cheers!!
Carrie