
Hey everyone! Andrea here, and today I just wanted to post the video I made showcasing all the beautiful elements of September's "This is Halloween" collection. Thanks for checking it out!
Halloween Fun with Allie

Hi there! Allie here today, and I'm sharing a layout today using my favorite Halloween photo of all time and the This is Halloween kit.

I started with the strip of tickets on the cut apart sheet. I knew I wanted to incorporate it onto my page somehow! Next, I cut out various sized strips from other patterns and moved them around my page until I decided to do a mini chevron. I trimmed the corners of each strip so they would line up, and stitched them down. Next, I added splatters of purple and black mist. I LOVE all the purple in this kit! I wanted the title to be "Halloween" so I grabbed two die cuts from the ephemera pack, and laid them at an angle underneath the chevron. I put my photo in the middle and backed it with tissue paper.

I had so much fun embellishing this page! I cut out little heart jack-o-lanterns from the acetate page and glued them randomly on the layout. I added sequins, flair, die cuts, and stickers! I loved all the pumpkins and hearts, and especially the fun flair buttons! This is such a special picture to me because it captures my little family perfectly, so I was happy to use lots of hearts. I finished off with sequins, and the layout was complete!

xI loved using this kit, and it was perfect for my special Halloween photo. Thanks for joining me today!
A Boo-tiful Weekly Spread with Tiffany

Hey everyone! Tiffany here again with another planner project using the new "This is Halloween" kits. So I'm sharing a weekly spread for the last week of October/first week of November. Yeah, I know it's too early, but the kit just called to be used to decorate the week of Halloween, so I did just that! I haven't filled anything in yet, but I did have fun decorating it with all the cute spookiness.
I paper-pieced a Julie Nutting doll together using the papers from the kit. I finally cut into that beautiful purple polka dot paper and made it into her dress. I lined her skirt and collar with one of the black and white pattern papers because I really just wanted that purple polka dot to pop. I did her boots the same way and finished her off by watercoloring her skin and hair. I then placed her onto my planner page and began embellishing!

First, I layered the bats from the ephemera pack over her in places to make it look like they are flying all over the place. I went ahead and fussy cut the dark purple witch's hat from the cut apart sheet to give my girl a nice finishing touch. I had to redraw the little spider coming from it on my page with black pen because it was difficult to really fussy cut that bit. I layered the pumpkin die cuts and little Thackery Binx at her feet and embellished the page with a few of the star die cuts and some enamel dots from my stash. I used the "Beware" gold foil sticker for my title of sorts, adding "the magic" underneath it. I then drew on a few little sprinkles of dots and stars to finish it all off.

I kept the opposite page pretty simple. Most of my plans happen during the week and it's the section of the spread that I use for writing down my plans the most, so I didn't want to clutter it with stuff. I took some scrap bits of paper from another project I created with the kits and made two banners for the top corner, just to balance out those polka dots. I then added a few stickers from my stash to embellish it.

The only major thing I included on this page was that "Halloween" sticker in the Tuesday section to indicate the holiday. I added "@ Disneyworld" using alpha stickers I had in my stash because I'll be spending the week at Disney with a friend. Again, I sprinkled it with a few dots and stars that I drew in with a black pen.

I hope you enjoy this spread! I enjoyed piecing together this little witch for my planner. I think she came out so stinkin boo-tiful!

Project Life with Odessa and This is Halloween

Hi! It’s Odessa bringing you a pocket page layout using the This is Halloween kit! This kit showed up on my doorstep the day after I watched Hocus Pocus for the first time with my kids which was perfect timing!

After laying out my pictures I cut down two of the patterned papers to make 3x4 cards. I really like all the lavenders and oranges and blacks this month so I’m loving the simple patterns in these colours! That purple polka dot paper is so good!!!

After cutting down some cards and getting it all laid out it was time for my favourite part... EMBELLISHING! I started by decorating the blank cards. I cut out some bits from the cut apart sheet, a tag that was perfect with the Hocus Pocus pic and a spot for journalling up top. Then I pulled out the sticker sheets and laid down some stickers (those gold clear stickers!!) and finally finished up with some of the die cuts. And of course, I had to use one of the flair pieces to add some fancy to my journaling.

While my layout is not a Halloween layout, the kit worked great for a general October weekly layout with a bit of spooky flair!
This Is Halloween A5 Planner Set Up with Henny

Hey hey everyone !!! Halloween is right around the corner and I couldn't be more excited 😊. Anyways... It's Henny here with you today sharing a new planner set up in my A5 "My Prima Planner" here on TheFairyTale Club blog featuring this super fun and cute "This Is Halloween" September kits. I loooove the color schemes of this Halloween kit. Can't it get any cuter than this? 😍😍. I can't resist!! Ohhhhh Halloween how I adore you 🎃👻🕷😸.


I guess we can start with my pockets over here, I took a lot of the ephemera and had fun embellishing it with bits and pieces from the ephemera pack. I also used up all of the flair buttons. I simply attached/glued a single paperclip on the back on each of the buttons. Therefore it is easier for me to just stick it into any of the pockets. I also grabbed one of the A5 dividers and slide it into the widest side pocket along with the sticker sheet that came with the kit. For the scallop edges cardstock, I took one of the packagings and used the scallop-shaped scissor and simply cut it into shapes just to give something sweet and lovely to look at for this setup.
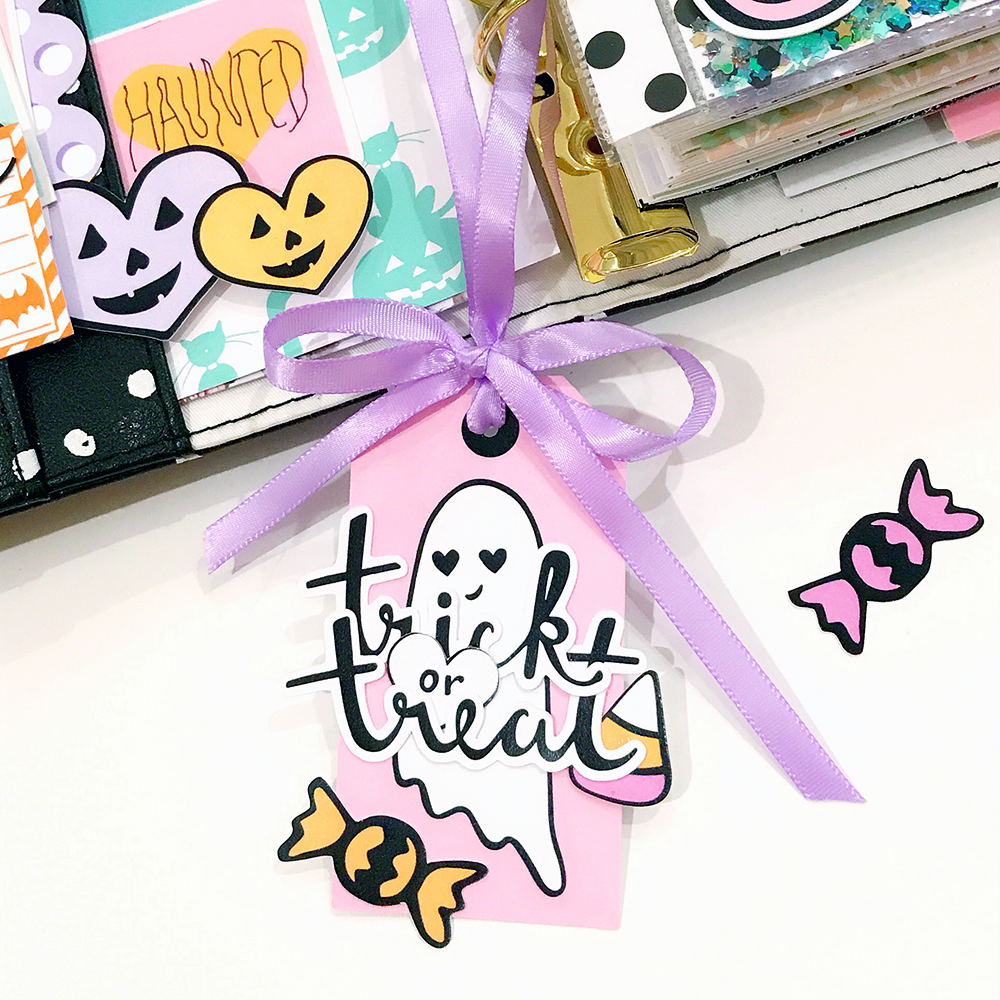
While for this tag, tried to not waste it so I just took some of the ephemera and glued them to the tag to create a little dimension, and have the top tied up with a violet color ribbon to make it more like a real tag and have it hung onto the ring bound. And here we have a simple and cute accessory for your planner, or also can be used as page marker.

And for the dashboard, I have created my own fun new shaker dashboard!!! by using one of the A5 dividers, filled it up with a bunch of mixed sequins. It's super easy to just throw all in your pouch and fuse it together.

Until next time!!
Sincerely yours,
Henny
Halloween is My Favorite Thing with Carolee

Hi everyone, Carolee here! I *love* Halloween so when I saw the This is Halloween kit, I was so excited! I can't wait to use it all month long! I was really inspired by the fun waterfall of candy like you see going into kids' bags in Halloween cartoons. I wanted to recreate that feeling here on the page while still keeping my more minimal style.
I chose one of my favorite photos from last Halloween of my dogs and me. I matted it first onto one of the personal-sized planner dividers then a piece of white paper that I used distress inks to stencil onto. I also added just a few drops of purple shimmer spray to add a touch of glitter. I put it on a 12x12 piece of black paper from my stash. It's perfect for Halloween and it makes everything pop!

After that, I pulled out the ephemera pieces and sticker sheet to start decorating the sides. I am so in love with that ghost and his silly heart eyes so I knew he had to go on. I took one of the word stickers to use as a title. After that, I picked a few pieces from the ephemera pack to add to either side.

Lastly, I grabbed some sequins from my stash to add even more color, shine and interest to the corners. After that, it was all done!

Hope you liked it! A bit different for me with the black paper but I liked changing it up. Until next time, happy crafting!
Halloween in Cars Land with Enza
Hello everyone! Enza here, and today I'm sharing my first layout featuring the super fun and colorful “This is Halloween” kit. We just came back from Disneyland, where it is all about Halloween right now, so I'm very excited to scrap all (most of) the photos I took.

I absolutely love all the patterns and colors in this kit. As I wanted to include several of them, I decided to create layered corners to place on opposite sides of the page. I also distressed the edges a little to add more texture and interest. The cut file I used here comes from one of the images included in the kit. I simply took a picture of it and imported it in my Silhouette software to trace it and create the cut file. I then backed half of it with white glitter tulle, and the other half with the awesome transparency that comes in the kit.

I adhered the photo down with some foam to achieve dimension, and had fun embellishing it with bits and pieces from the ephemera pack.


To balance the right side of the layout, I created a cluster with more die cuts, stickers, and the “Boo” flair. Black splatters finished the layout.

Thank you for stopping by today. Have a great day!
Enza
Kim's October Planner with This is Halloween

Hi there it's Kim once again with a project that you'll want to stay tuned for the entire month. What I've done is set up an entire standard travelers notebook insert using the "This is Halloween" Kit from Andrea! If you haven't seen it I did a quick unboxing of it!
I've taken a few snapshots of this project, but I've also made a quick flip through video so you can see each page in it's entirety before I've even used a pen on the pages. I'll talk below most of these photos a bit but the video will have the best looks!

I've gotten into some paper notching to help nest with patterned paper and the designs on them. I liked layering but was frustrated before now with how to make my composition work without stashing the paper to bits (not showcasing those full fonts too)!

To make up for the space I lost using this striped bag, I added a bit of the 12 x 12 paper with tabs on top for an easy notes page.


A nested pair of makeshift tags in the corner had to have that striped twine as an accent.

This is one of my favorite pages. I bird tailed a whole bunch of different sized papers and layered them across the page.

Adding a few die cuts and stickers to add the finishing touch made it really pop

I wanted to try a "wrapped" effect on this pattern paper by slicing the ticket stubs and attaching them at opposite ends.

Beware! Pocket ahead! A great way to store more notes. shopping lists or to-do lists.

I had a whole bunch of scraps lying around and decided to make a two page border. I added a striped washi as an inside frame and used a couple of stickers to round it out.

I decided to watercolor on the last page since I rarely use the notes section after it. I keep it very dry so there is little bleed through, but I love the gray pattern as a base for what will be that day's plans. The sticker bleeds on the page next are a great way to add a pattern, as I have, or they can segment off a section for a task list.

Finally, I had to use that lovely acetate. I just cut a piece that would fit between the staples and it now had a sticky note attached for a quick reminder.
Here is the quick flip through video with all the pages.
Thank you again for stopping by the blog today! I had a great time setting this up!
-Kim
Teresa's October Planner Set-up
Hello people!
It's Teresa today with my Halloween planner set, and OMG the kit is the best! I adore Halloween so I was beyond excited to get this!

It's fun Halloween colors! Which I love! You get the cutest dashboards in this kit!

Plus this orange pom pom paper clip! This kit "put a spell on me"

Stuffed pockets are the best! When you have so much cute stuff you wanna use it all at once!

The "This is Halloween" kit has so much fun girly items! I love pink! And this kit was spookily girly for me!

Thanks so much for checking it out!
Halloween Printable!
Happy Halloween, everyone! I just love this time of year, don't you? In celebration of the season, here's a free printable for all you scrappy people!

Just click the image to download a .zip file with both an A5 Divider size and 4x6 pocket card size version of the printable. Enjoy the printable, and here's wishing you a very spOOooOky and fun Halloween time!