Carrie's Sunshine & Snow Project Life Spread

02132019-PL-Snow-Day-01-Final.png

Hello Everybody, Carrie here with a February spread in my Project Life album. I used the gorgeous Practically Perfect Kit and gave it a bit of a love theme for February. We’ve been coated in a bunch on snow here in Seattle the last couple weeks which is not normal, so I wanted to make sure to document some of our snow days. These photos are a little over a week old and we have so much more snow now it’s crazy. The photos from this day in particular are some of my favorites because of the snow and sunshine together, as well as my daughter playing in the yard with one of our dogs.

02132019-PL-Snow-Day-02.png

To begin this spread I quickly decided on using a pocket page of three 4x6 inch photos. I placed the photo of my daughter in the middle and cut two 4x6 inch cards from one of the 12x12 inch floral papers. The floral paper cards I added to the pockets above and below my photo. Next I decided to use two sizes of heart shaped dies and cut a bunch of hearts out of solids sections of paper from some of the planner inserts.

02132019-PL-Snow-Day-04-Final.png

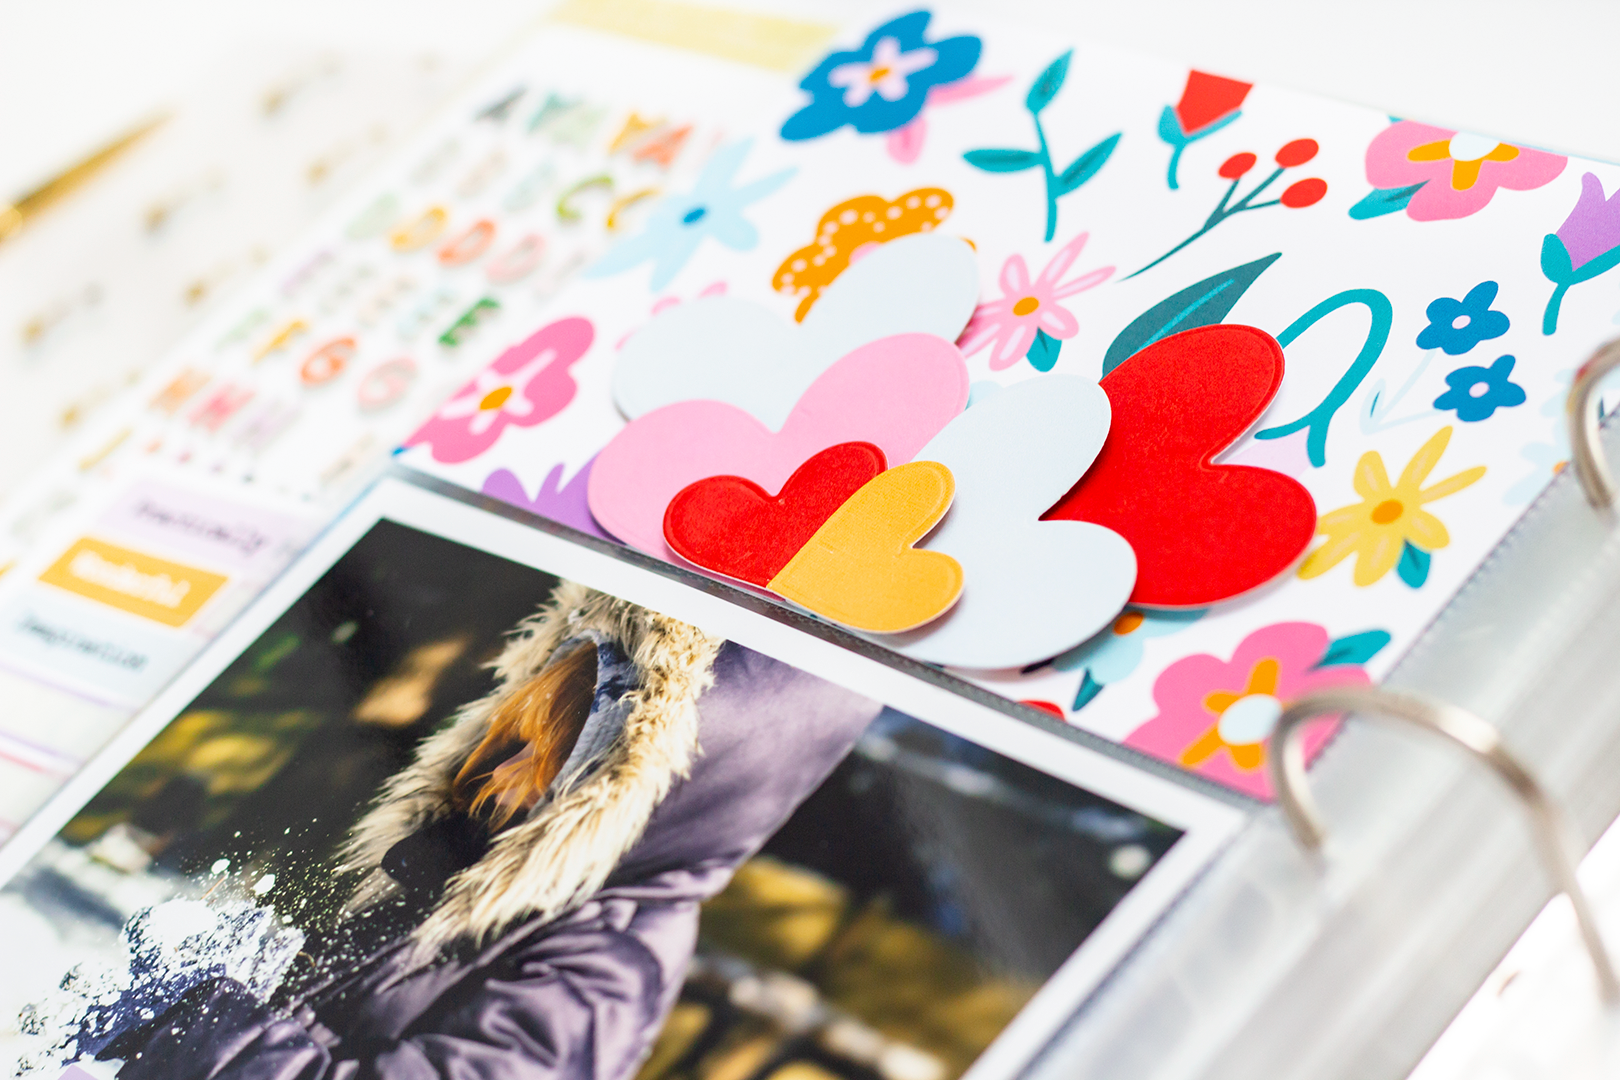
I layered the die cut hearts together on the floral cardstock both above and below my photo. To give them a little dimension I used red line tape at the bottom of each heart and a thin foam adhesive at the top.

02132019-PL-Snow-Day-05-Final.png

As a final touch for this side I used the “superclifragilistic” and “expialidocious” stickers from the sticker sheet and added them with a thin foam adhesive. To give a little more interest I decided to place one on my photo and the other on the paper below.

02132019-PL-Snow-Day-06.png

On the opposite page I started out by adding the “s” and “p” in Pink Paislee Thickers to one of the 2x3 inch photos (it’s a photo of snow), to identify my daughter and our dog. I used the same pink paper as one of the heart dies to fill in the empty space of the “p” because I feel like it makes the letters easier to read and I like the look. To help tell the story of my daughter’s relationship with our dog Ponyo, I also decided to use one of my small heart punches and punched out a heart from one of the same red papers as the other hearts. I used foam adhesive and placed it in between the two initials. To finish off this little 3x4 inch pocket I added the super cute yellow pom pom paperclip from the stationery pack. I love seeing these pom poms stick out of my albums.

02132019-PL-Snow-Day-07.png

Once I had the rest of my photos placed for this 9x12 inch page I added the cute yellow quote card from one of the cut apart sheets in an empty 3x4 inch pocket. I could have left it just like that but thought that the two penguins reminded me of my daughter and Ponyo playing in the snow. Because I didn’t have a lot of space on the card I cut the smallest pair of penguins out of one of the cut apart sheets. I added them to the card with red line tape at the bottom and foam adhesive at the top. To help tell the story of the pair having fun I also placed the “yay” sticker from the sticker sheet, tucking one end under a penguin and popping up the other end with foam adhesive.

02132019-PL-Snow-Day-08.png

I knew I wanted to add journaling to the last 3x4 inch pocket so I cut a notepaper card from one of the planner inserts. Typically I’ll add journaling using my typewriter, but this time decided that the photos told enough of the story that all I wanted to write was a descriptive title and the date. I used the same Pink Paislee Thickers for my text and used the same pink paper to fill in the empty spaces in the letters. To help tie in the floral paper I decided to add the red tulip die cut from the die cut pack, again only popping up the top with foam adhesive and tucking the bottom into the text. Since I thought the sunshine and snow were so pretty together I also placed the “wow” sticker from the sticker sheet above the flower using foam adhesive…..and that’s it!

Thanks so much for taking a look at my project and I’ll see you next time : ) Carrie

02132019-PL-Snow-Day-03.png

Adding Glitter Splatter with Carrie

Hello Everybody!  It's Carrie here with my first post using the gorgeous Hello Beautiful Kit, as well as my first post as an official design team member : )

Today I'm sharing a 6x12 layout that I've now placed directly into my 6x12 Project Life album for April. Yay!!  We recently did a little exploring here in Seattle, and I snapped a few photos from a visit to a lovely Japanese Garden.  The actual photo on the layout was taken just outside the gardens, but it is currently sitting next to photos from inside.  It was such a beautiful place to visit I'm already looking forward to going back!

To start out creating this layout I took the colorful striped sheet of 12x12 paper from the kit and cut it down to 6x12.  Then, I used some watered down Martha Stewart Crafts Pearl Paint and splattered it all over my paper using a paintbrush.  Before the paint dried I added this ultra fine iridescent glitter to the paint to create a "glitter splatter".  To keep the glitter from rubbing off once it dried I sprayed a clear archival sealer all over.  Works like a charm every time!

Next, I added my full size 4x6 inch photo directly onto the paper and popped it up using a rectangle piece of foam paper I trimmed to size using scissors.  Since the green in my photo was a different shade then the green on the paper it was an easy decision to place it there.  

With my husband and daughter in the background of my flower photo I decided to use the "you are my favorite" die cuts from the phrase die cut pack.  I also popped them up but this time used foam adhesive.  I think having the pink words next to the pink paper creates pleasant movement for the eye, so that was another easy choice for me.

At this point I decided that the large butterfly from one of the planner inserts would be a great statement piece, so I fussy cut it out.  To add a little more interest to the butterfly I used yellow and lime green Stickels to color in a little here and there.  At first I was worried about there being too much glitter, but the background splatter is so subtle that it ended up working out just fine.

Before attaching the butterfly I ended up using embroidery thread along two lines at the top and one at the bottom of the layout.  To make the process as quick as possible, I used my speedy sewing machine to do the hard part of making the straight lines of holes in my paper.  Then, I just matched up the different shades of blue and yellow and embroidered while I watched some Netflix.  Because my layout is so busy but yet still somehow simple, adding in the matching thread adds that little extra element without it being too much.

To finish the page I added my butterfly, popping up the edge of the wings with foam adhesive and that's it!  All in all other than the photo, I think my favorite part of the layout is the glitter splatter.  I haven't used that technique in a while and I just love the way it pops through the different elements on the page.  I hope you enjoyed today's post, and I'll see you next time!

Everyday Memories with Enza

Hello, everyone! Enza here, and I'm back today with a new layout featuring the amazing Everyday Wishes kit.

PHOTO Main - Jan29-2.jpg

I love using die-cuts and dimensional elements on my pages. They add texture and color, and create lots of interest, especially when grouped together to form clusters. I started by backing a heart wreath cut file with several patterned papers from the kit. I was not sure how I wanted to add more dimension to it. I thought about adhering it down with foam adhesive, which is what I usually do, but ended up creating a shaker in the center of the wreath instead. Shakers are such a fun element and very simple to make. Here, I just adhered a piece of acetate to the cut file before gluing it down. Easy peasy. I love how the colorful sequins move around and make this layout more interactive. To jazz up the background, I also splattered some mist on it, making sure to use colors that coordinated with the papers in the kit.

For the photo, I created several layers behind it with patterned paper and embellished it with many die-cuts. The ticket stubs come from one of the cut-apart sheets. I simply stapled them together and used hearts in coordinating colors for a tone-on-tone look. The word die-cuts are perfect to create titles. There are so many of them! Again, I used foam adhesive to give it dimension.

To finish the layout, I added a small cluster of embellishments on the opposite side of the photo to balance it out.

That's all for today, friends. I hope you enjoyed reading about my process and will feel inspired to use some of these tips to add dimension to your next scrapbook layout.