Violet's "Tiki, I Love You" Planner Bookmarks

Hi! Violet on the blog again today, and I wanted to share how I used the "Tiki, I love you" kit in my ring bound planner.

image1.jpg

I used the journaling cards and card stock to make planner book marks. I trimmed the parrot from a journaling card and added it to card stock. I added some glitter to his feathers, because he needed to be a little extra. He’s so stinking adorable!

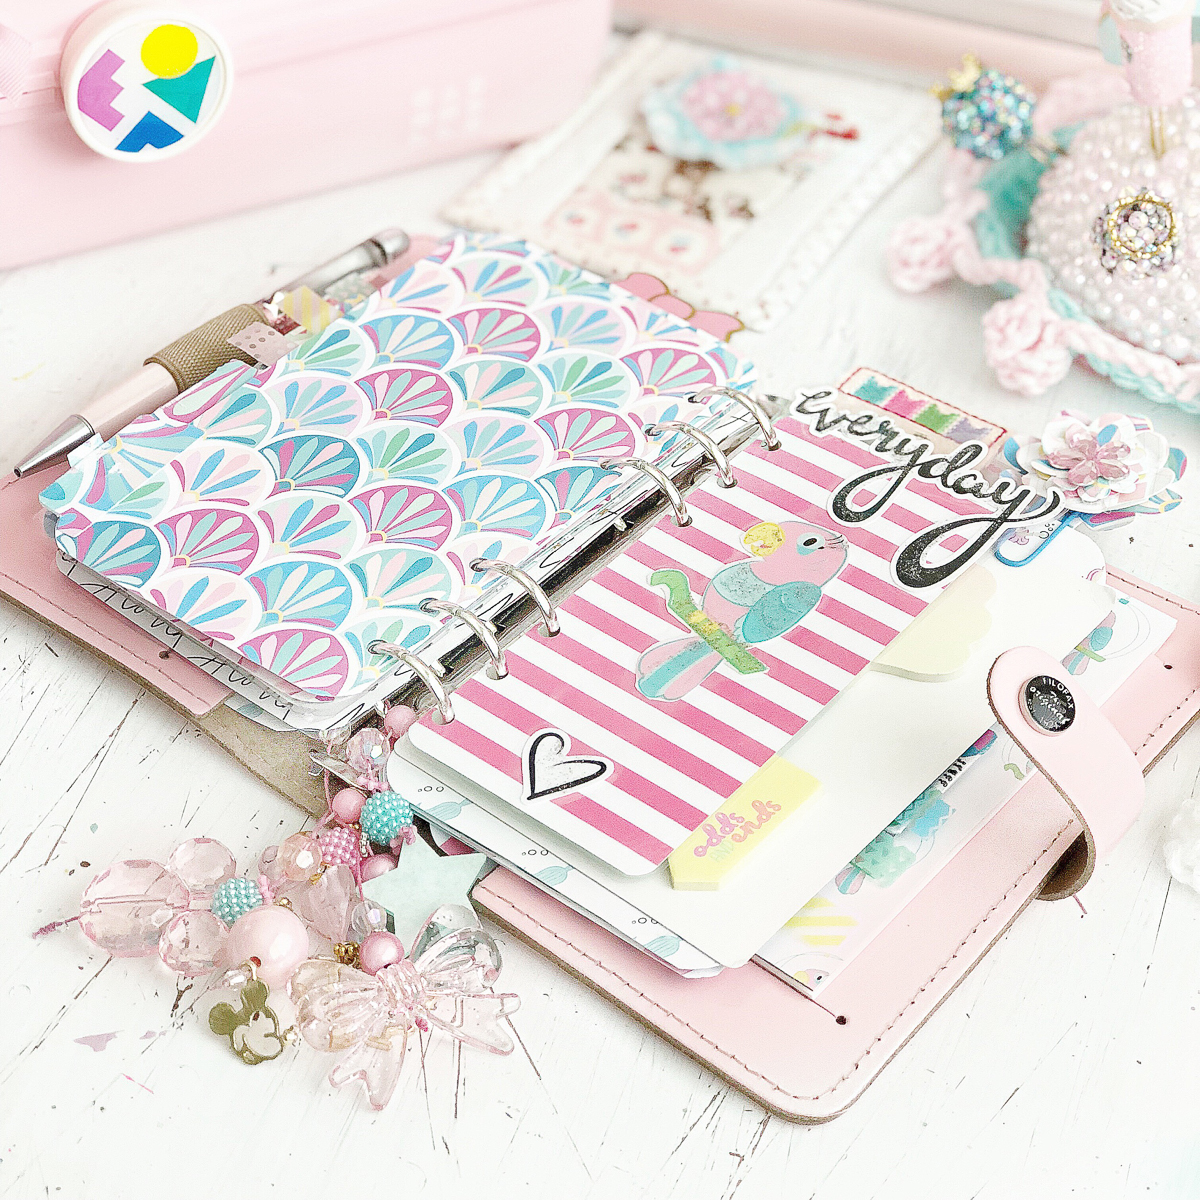
I use them inside my planner so I know exactly where I want to open my pages. I used the "everyday" word ephemera on top and laminated it, before I punched and placed it in the perfect spot.

Here is a top view of the planner bookmark. And below, you can see how I used the sunglasses ephemera as a tab for the top of the other bookmark. It just adds that little extra cuteness and a good way to use up your ephemera.

image6.jpg

I absolutely love the "Tiki, I love you" kit. The colors reminds me of summer, and all the tropical vibes, from flamingos to parrots and mermaid, made it a planner's paradise!

Violet

Adding Glitter Splatter with Carrie

Hello Everybody!  It's Carrie here with my first post using the gorgeous Hello Beautiful Kit, as well as my first post as an official design team member : )

Today I'm sharing a 6x12 layout that I've now placed directly into my 6x12 Project Life album for April. Yay!!  We recently did a little exploring here in Seattle, and I snapped a few photos from a visit to a lovely Japanese Garden.  The actual photo on the layout was taken just outside the gardens, but it is currently sitting next to photos from inside.  It was such a beautiful place to visit I'm already looking forward to going back!

To start out creating this layout I took the colorful striped sheet of 12x12 paper from the kit and cut it down to 6x12.  Then, I used some watered down Martha Stewart Crafts Pearl Paint and splattered it all over my paper using a paintbrush.  Before the paint dried I added this ultra fine iridescent glitter to the paint to create a "glitter splatter".  To keep the glitter from rubbing off once it dried I sprayed a clear archival sealer all over.  Works like a charm every time!

Next, I added my full size 4x6 inch photo directly onto the paper and popped it up using a rectangle piece of foam paper I trimmed to size using scissors.  Since the green in my photo was a different shade then the green on the paper it was an easy decision to place it there.  

With my husband and daughter in the background of my flower photo I decided to use the "you are my favorite" die cuts from the phrase die cut pack.  I also popped them up but this time used foam adhesive.  I think having the pink words next to the pink paper creates pleasant movement for the eye, so that was another easy choice for me.

At this point I decided that the large butterfly from one of the planner inserts would be a great statement piece, so I fussy cut it out.  To add a little more interest to the butterfly I used yellow and lime green Stickels to color in a little here and there.  At first I was worried about there being too much glitter, but the background splatter is so subtle that it ended up working out just fine.

Before attaching the butterfly I ended up using embroidery thread along two lines at the top and one at the bottom of the layout.  To make the process as quick as possible, I used my speedy sewing machine to do the hard part of making the straight lines of holes in my paper.  Then, I just matched up the different shades of blue and yellow and embroidered while I watched some Netflix.  Because my layout is so busy but yet still somehow simple, adding in the matching thread adds that little extra element without it being too much.

To finish the page I added my butterfly, popping up the edge of the wings with foam adhesive and that's it!  All in all other than the photo, I think my favorite part of the layout is the glitter splatter.  I haven't used that technique in a while and I just love the way it pops through the different elements on the page.  I hope you enjoyed today's post, and I'll see you next time!