Hello everyone! It is Andrea here and today I am so excited to share with you the full kit reveal for our new collection/kit, "This is Halloween"! Now, I love designing all of The Fairytale Club kits...but, this kit was extra-special to me because of it's subject matter...namely, Halloween! I absolutely am in love with Halloween-time and I always have been! It is my favorite holiday and I celebrate it every year to its fullest!...with tons of decorations, shopping and presents and candy, special outings and traditions, themed outfits and pajamas, costumes, baking, crafts, jack-o-lanterns, trick-or-treating, tons of pictures, and so much more! To me, it is the best time of year, just filled with magic, and so I was just thrilled to create a kit that could celebrate this fabulous holiday and help you all to document it, whether that be through planning or scrapbooking or both! This kit is perfect for your Halloween-time papercrafting needs! And will work great to make cute Halloween cards and home decorations as well as working beautifully in your planner and your scrapbook!
Let's talk a bit about the inspiration behind "This is Halloween"! As I said, I love Halloween!!! And I, therefore, had to make this collection reflect all that I love about Halloween! I wanted this collection to be about the magic of Halloween! To me, the magic of Halloween is about all the wonder and happiness and whimsy it brings...the kind that you feel when you are a kid trick-or-treating, and that you still feel as an adult, looking at all the cute decorations and watching fun movies like "Hocus Pocus" and "Nightmare Before Christmas" that really reflect the season and what it's about! And as you may already be able to tell, those two movies are the ones that I chose for my inspiration on this kit.
As you know, I always pick Disney movies to inspire me while I am designing, and I was so inspired by "Hocus Pocus" and "Nightmare," and you can see how that reveals itself in the collection. For example, all those cats and witches and references to magic...well those were definitely inspired by all the witchy goodness in "Hocus Pocus" ! And the "Nightmare Before Christmas" vibe can be found in the kit, too, in details like the spider-webbed hearts, some of the fonts and sayings, and just the combination of Halloween goodness (i.e. pumpkins, bats, spiders, ghosts, witches, etc), which reminds me of the town of Halloween, itself!
Now, let's take a look at all the goodies in "This is Halloween", shall we?! First, let's look at the patterned papers. I love our patterns in this collection! As you can see, the color scheme for "This is Halloween" is so much fun! We have the traditional orange and black, but also these awesome pinks and purples and green too! I am loving the lavender especially! These fun colors add a more modern feel to our "This is Halloween" collection and are very on trend!
And the patterns themselves are a mix of the traditional Halloween and also a newer style that is very popular right now and which I am digging, too! I myself am both a Halloween traditionalist, who loves orange and black and vintage/retro Halloween goodies...and I am also someone who loves the cute, new vibe of Halloween that has been coming out lately which is very sassy and sweet and incorporates things like pastels and hearts! So, in the collection you will find this combo of old and new...of vintage Halloween and also today's Halloween! I think a good example of this is the "This is Halloween" patterned paper. It is called "This is Halloween", like the collection itself, because I think it represents a combination of Halloween goodness and also magic and whimsy that the collection is all about! It has ghosts and jack-o-lanterns and skeletons and spiderwebs and bats and it is just so cute! Very modern and trendy on the front! And on the back, there is a beautiful, traditional orange and black stripe that is much more retro and classic.

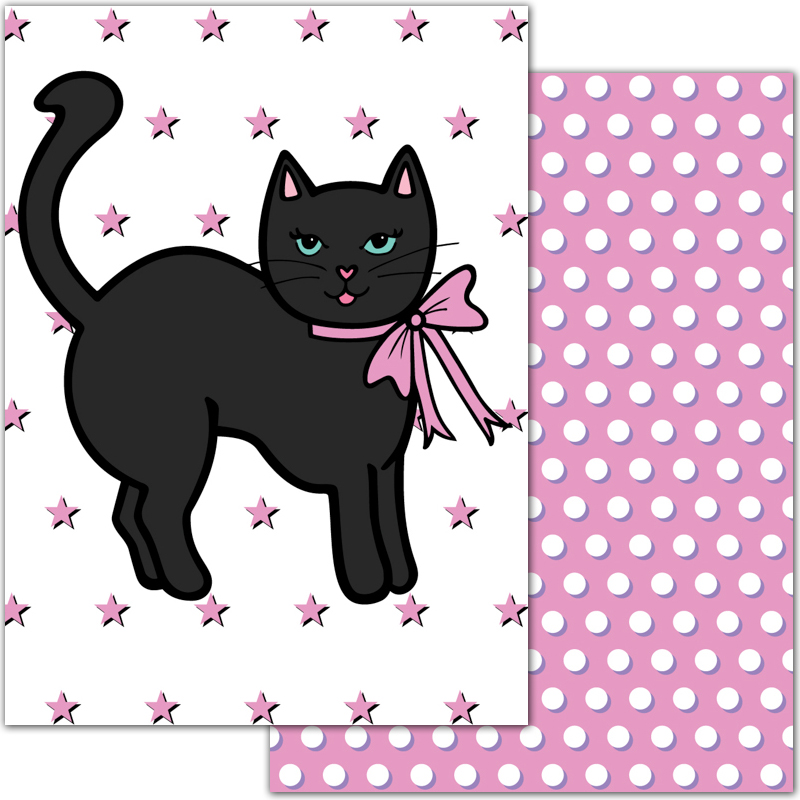
One of my favorite patterns in the collection is another kitty pattern...a kitty witch to be precise! I am in love with our lovely "Hocus Pocus" patterned paper! The pink background with the cute little cat in her cute little witch's hat just makes me smile! And on the back is a simple, but oh so versatile and useful, star pattern.

Another favorite of mine is the "I Put a Spell On You" patterned paper. On one side, you find a cute little vintage image of a kitty sitting on a jack-o-lantern, but it's in a cute and unconventional minty green color instead of the more traditional black or orange. And on the other side of the paper, you find a very cool geometric pattern which is very modern looking, but in the more traditional orange and white color scheme.

I am really excited to get my hands on the "Sanderson" patterned paper! The one side with the southwestern style print, but in the Halloween colors, is so amazing! But I think I may love the other side even more, with just the simple, big, orange polka dots that are themselves made of little, tiny polka-dots!

The "Boo!" patterned paper is so cool! I love the "boo" script! Way cute! And the doodled stars on the back feel very artsy and fun!

Another fave of mine is the "Binx" patterned paper! I love those little black cats! How stinking cute are those!!! And the lavender and orange plaid on the back just screams fall!

And the "Jack and Sally" patterned paper is so fabulous! Obviously, the spider-webbed hearts in orange and lavender are way cute, but the dimensional lavender polka dot on the back is just so very pretty, too...both sides are just gorgeous and I am excited to use them!

Then, there are our cut-apart sheets... Well, I am loving the cut-aparts for this collection! Our first cut-apart is called "Nightmare" and it has our 4x6 decorative pocket cards on it! I love the one that says "Halloween" on it, and also the one with the cute, retro, happy jack-o-lantern! And then on the back there is that awesome black and white pattern that works great with anything really!

And the other cut-apart is called "Trick-or-Treat". And it has tons of goodies on it...labels, tags, tickets, 3x4 and 2x2 decorative cards! So great! I am particularly in love with the ombre "Halloween" piece and also all the cute 2x2 cards, especially the super cute white one with the spiderweb eyelashes! And the back of the page is this really cool multi-colored chevron that is super modern and fun!

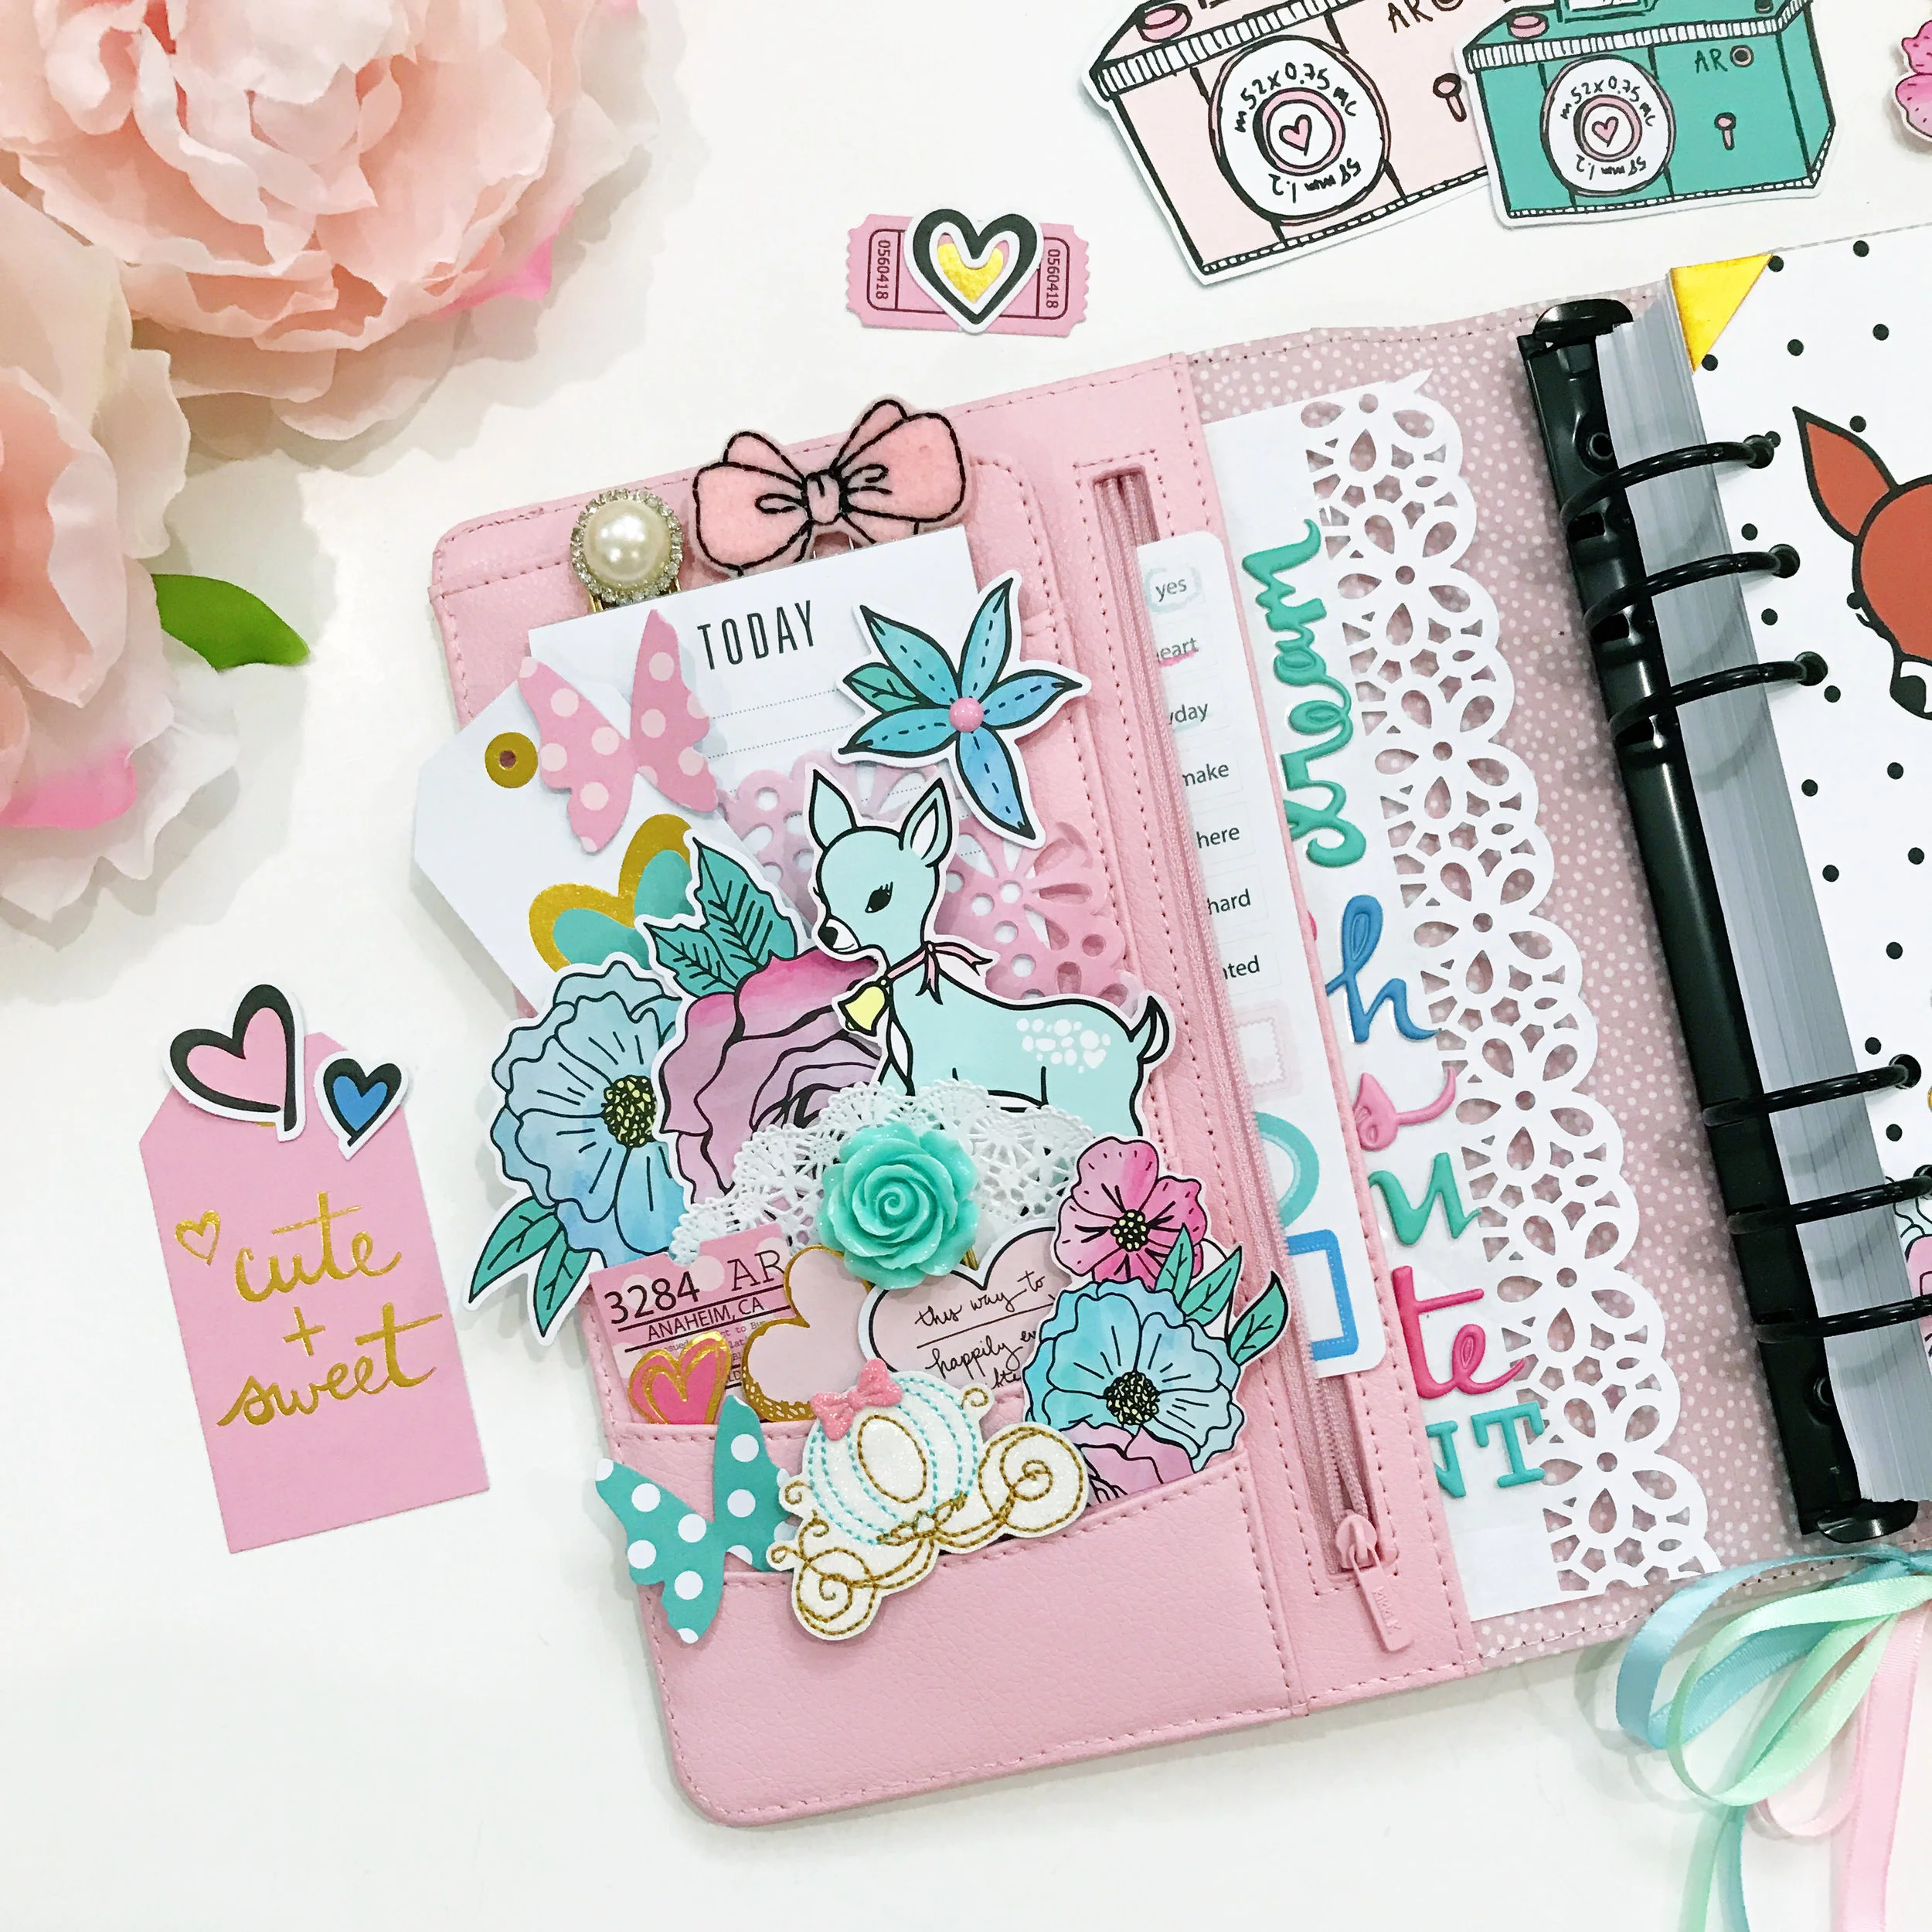
Now that we have looked at all of the amazing patterned paper in the kit/collection, let's now take a look at our spooktacular embellishments! First, let's check out our ephemera pack! We always do an ephemera pack in our kits and that is because they are super cute but also super versatile and useful and can be used for multiple purposes. They look great on a layout, but are also perfect for tucking into the pockets of your planner...and they can be used and re-used if you want because you don't necessarily have to adhere them down. I really had fun and put a lot of thought and time into creating these ephemera pieces. My favorite pieces are the little cameo witch (she is so very cute and pretty!), the half painted pumpkins, the little pink ghost tag, the jack-o-lantern hearts, the two Halloween scripts, the boo lollipop, the kitty witch...and so many more! Really, I just love this ephemera pack...it is jam-packed with Halloween magic!
In addition to our classic choice of ephemera pack for this kit, we also wanted to make some new choices for embellies and so we decided to include some flair this time....yaaaaaay! I am so very excited for the flair! I have been wanting to do flair since we started The Fairytale Club, and we are finally doing it! So the flair pack comes with 6 flair buttons. There is a super cute "boo!", a sweet kitty witch, a happy jack-o-lantern, a fun ghost, a cool "xoxo" and my pretty little witch (this time with pink hair)! I can't wait to see what you all do with this fabulous flair!
For this kit, we decided to do shaped stickers again. We tried out a shaped stickers sheet for our last kit and we got a great response, so we thought we would do it again for "This is Halloween," and I am very excited! The sticker sheet is definitely one of my fave things in the collection! It is just way cute, with the ghost and the witch kitty and the silly skull and all the little bats and stars and things. And I especially love the cool square stickers that say things like "magic" and "halloween is my favorite thing" and "haunted" and "trick-or-treat"!
And for another new embellishment that we have never done before in our previous kits, we decided to add in some cool gold-foiled-on-vellum word stickers! Well, actually there are mostly words, but some awesome shapes too! I loooooove these! So cute! We have words like "beware" and "spooky" and "spell" and "boo" and also cool shapes like jack-o-lanterns, hearts and bats! These are going to look fabulous in your papercrafting projects!
Now that we have looked at our cool embellishments for the kit, let's take a look at the planner dividers in "This is Halloween"! The planner dividers for this kit are a bit different than we have done with the last couple kits, as we have decided to return to the original way that we did the dividers set. So, just as it once was, we have decided to do pure decorative dividers for you in this kit, and forgo the calendar pages. So, let's take a look at our decorative planner dividers, shall we? They are super duper, uber cute and just filled with fun Halloween images and Halloween sayings!
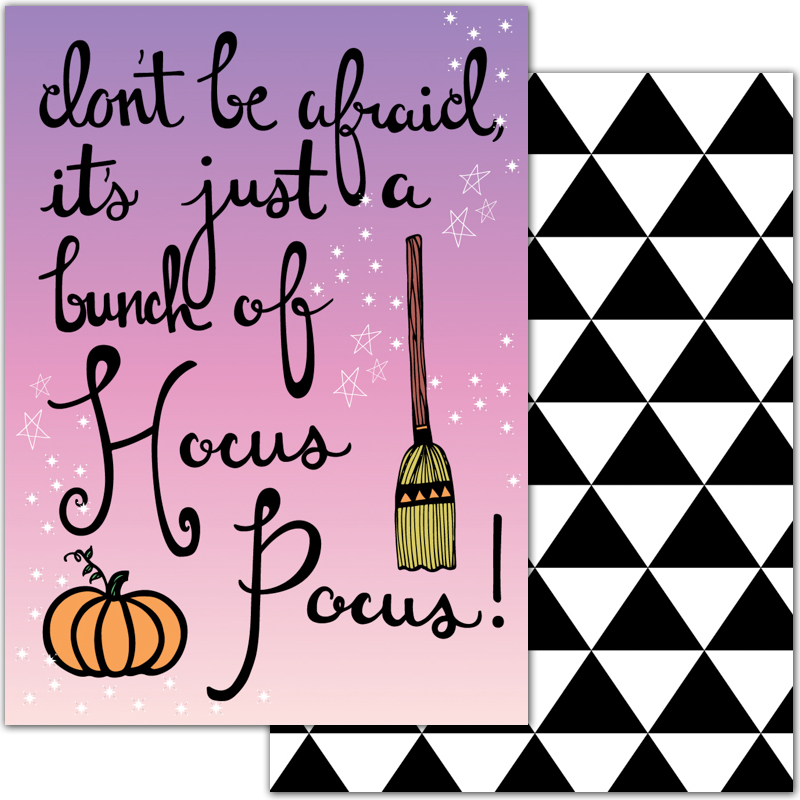
I love the "Hocus Pocus" themed dividers in the kit! One of my favorite planner dividers is the one that says "Don't Be Afraid, it's just a bunch of Hocus Pocus" on it! I love the ombre in the back and all the cute little sparkles! Another one of my absolute favorite planner dividers is my super duper pretty and oh so cute little witch with the green hair that says "I put a spell on you" (like the song that the Sanderson Sisters sing in the movie)! She is so special and looks so beautiful against that pretty lavendar gingham background!

I am also loving the really retro looking dividers! I love my happy jack-o-lantern! How cute is she, with her wide eyes, big smile and those fab polka dots in the background! So vintage looking and so adorable! And the little black cat sitting on the jack-o-lantern is so very retro too and makes a great silhouette against a traditional orange background.


There are a couple of dividers that have that cool "Nightmare Before Christmas" kind of vibe, like the one that says "welcome to our town of halloween" (with the cute little face on it that looks like a certain pumpkin king), and also the ombre one that says "halloween is my favorite thing". These are two of my favorite pieces in the kit!


I love the modern, kitschy "pastel goth" looking dividers too, like the fun heart bat and my super sweet witch kitty! She is just so adorable! Both of them are way cute!


I am also excited about word/phrase dividers in the set, like the "beware" divider and the one that says "you look fab-boo-lous"! That one especially is so funny, with the spiderweb eyelashes and the silly pun!


And last but not least, I am in love with the magical dividers like the lovely black cat against the dimensional black and lavender stars, and especially the super duper cool "trick-or-treat" divider with the little trick-or-treating witch and her little kitty, having some Halloweeen fun! That one is really special!

Ok, now, lets talk about another special, and new addition to the collection/kit this time around....transparency!!!! Yes, for "This is Halloween", we decided to do a transparency! I am super duper excited about it! We have for you a cool jack-o-lantern heart transparency called "I heart Halloween", which is perfect for you to use for your TN inserts, for your scrapbook mini albums, for cardmaking, for a planner divider...really anything you can think of! It is way cute and brings some extra magic and fun to this super magical and fun collection! It is a new addition that I know you will love and that I hope we can do more of for future kits!

Alright, there is actually another surprise part of the collection that I cannot yet reveal, so stay tuned for that! It is a bit of a Halloween Surprise...so you will have to wait to find out! Otherwise, that is it for our "This is Halloween" full kit reveal! I am so thrilled for this collection/kit! I can't wait for you all to get it! I hope you enjoyed the reveal, and get ready for Halloween-time guys, because the bestest, most magical, wonderful, and spooktacular holiday ever is just around the corner and calling on you to be a big kid again...a kid who believes in fairytales, hocus pocus, and a Happy Halloween!
xoxobooxoxo -- Andrea :-)