Aimee's Halloween Layout

Hey all, it’s Aimee!

Are you a planner girl or a scrap girl? I am 100% a scrap girl, but I love planners. But really I’m just a paper lover. Today I’m sharing a mix of both worlds, using the “Magical And Mischievous” Happily Ever After kit!

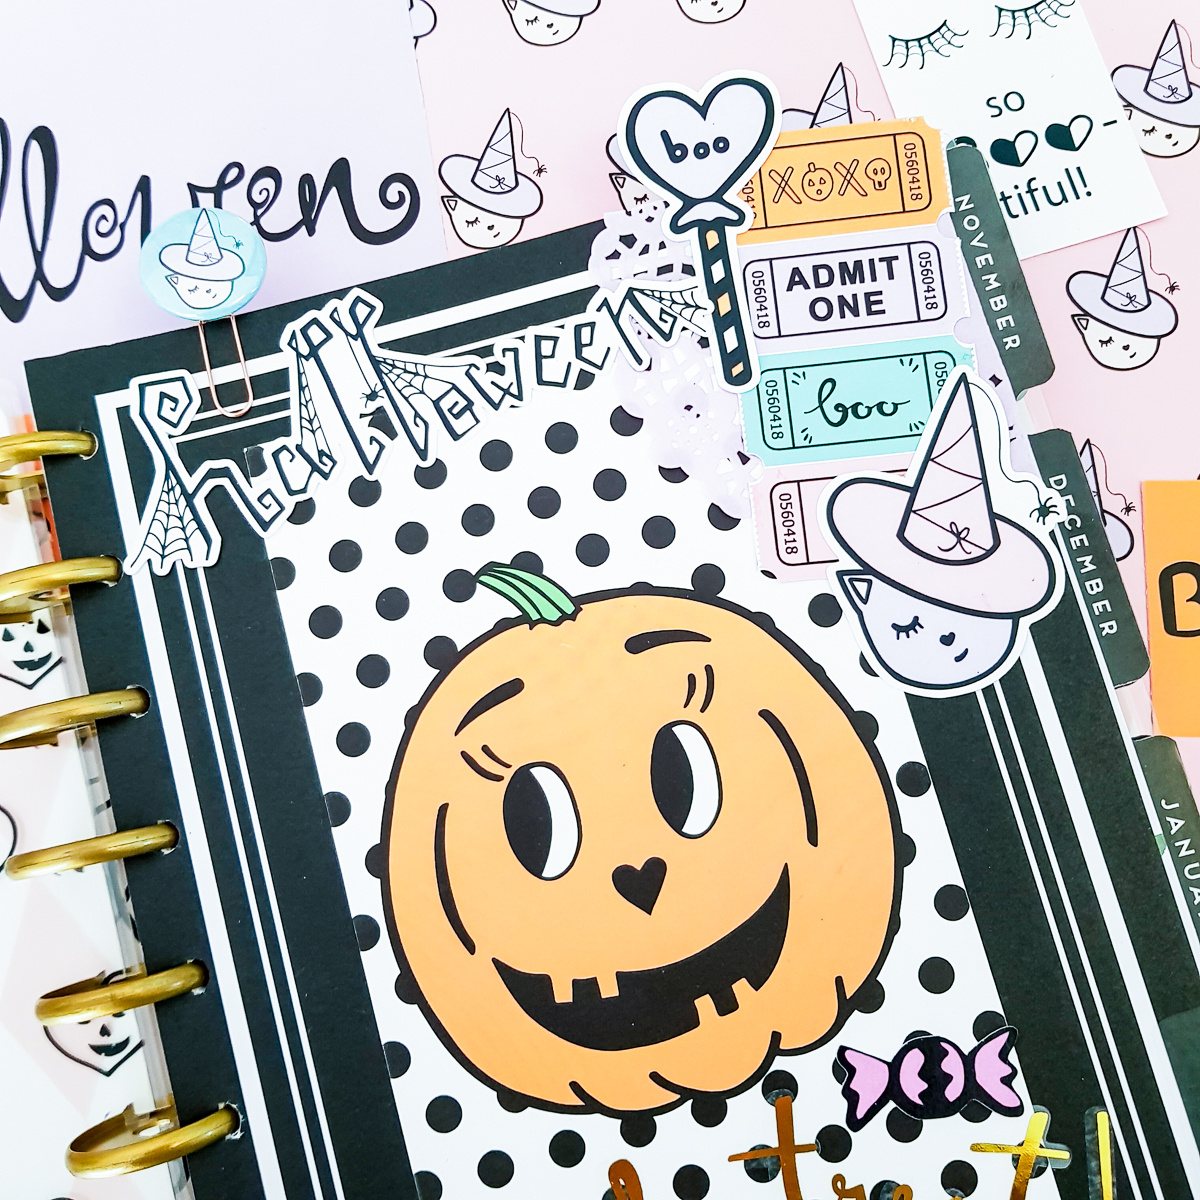
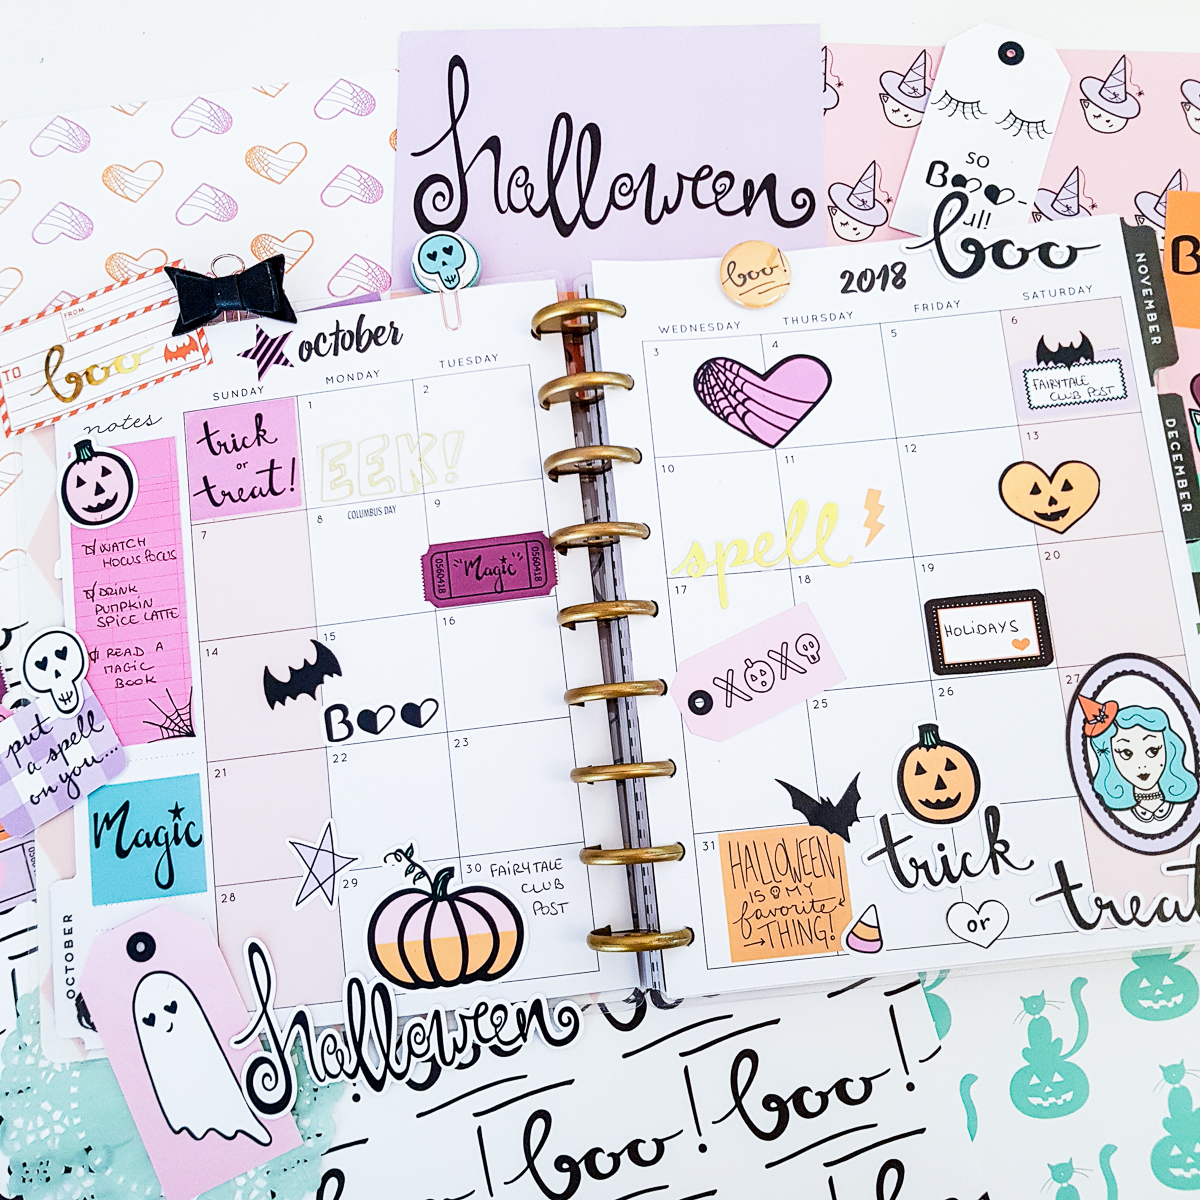
I used the “October Calendar” A5 divider as my focal point for my scrapbook layout. Say What? That’s right. I used an A5 divider on my layout. I even got to play around with my stamps, as if I was a planner girl.

I first stamped the dates on the A5 divider. I then matted my photo with another A5 divider, the super cute purple ledger paper.

I added some foam adhesive to the back of the matted photo and adhered it over the calendar, just so you could see some of the dates.

I really wanted to use one of those pom-pom paper clips, but they are a bit puffy for a scrapbook layout. No problem, I just trimmed the back of the pom-pom to make it lay flat on my layout. I then slipped the “Magical and Mischievous” banner under the paper clip {I first added a bit of adhesive to the back} and then stapled the paper clip in place.

I journaled on some plain cardstock with my typewriter. I made sure there was enough space between each line/sentence so I could cut them a part. Once I had cut my journaling a part, I adhered it to my layout. I then used foam adhesive to adhere the candy and pumpkin die cuts.

And to finish off my layout with a little pizzazz, I faux stitched around the A5 divider with a white gel pen.

Do you ever use supplies that weren’t intended for scrapbooking/planning?

XOXO Aimee

"This is Halloween" Sale and October Planner Dashboard and Calendar Setup

“This is Halloween” Sale! In addition to our beautiful new "Magical and Mischievous" collection that we put out for this Halloween-time, we also have a few goodies left in stock from last year's "This is Halloween" collection. So, right now for a limited time, we are having a special sale on last year’s Halloween goodies! All products from "This is Halloween" are 40% off (no code required)...and as an added, spooktacular bonus, if you also purchase a "Magical and Mischievous" kit or paper set along with your “This is Halloween” goodies, you get 15% off of that with the code "HALLOWEENSALE"! Yaaaaaay! NOTE: For us to honor the code, you must have “This is Halloween” product(s) as part of your purchase!

Oh, and here is a cool little planner project our DT member Adeline made using last year's Halloween kit...it’s so cute, right? Get yourself some "Magical and Mischievous" and some "This is Halloween" goodies today! They will totally coordinate together and look so creepy cute!!!


Hi my fairy friend,

It's Adeline today for the blog, I am happy to see you for a new post! And not just any post, but a post on one of my favorite themes. Autumn is my favorite season, and, after Christmas, the holiday I love most is Halloween! So, you guessed it! My post for today will be on this theme.

This is halloween1.jpg

So I decided to use the kit from last year called “This is Halloween” and my Happy Planner to achieve two decorations. First of all, I made a dashboard.

For that, I cut the acetate sheet from the kit and added it to the happy planner (on the left). Then, on the right-hand side planner insert I adhered one of the personal-sized dividers from the kit (pumpkin with black on white polka dots). Then I added some embellishments like gold foil stickers, die cuts, doilies, and a paper clip done with a flair button.

Don’t you find this pumpkin so cute?

And the second thing I decided to do, and I did not do it often enough, was to decorate my monthly double page to make it really fun and boo-tiful!!!!

This is halloween1.jpg

For that I used some die cuts from the “This is Halloween” kit and also some regular stickers and some gold foil ones .

I created a little Halloween Bucket list which is :

  • “Watch Hocus Pocus” - I love the Sanderson sisters, don’t you?

  • “Drink a pumpkin spice latte” - It’s not traditional in France, but I want to taste it.

  • “Read a magic book” - They’re my favorite.

This is halloween6.jpg

I hope you enjoyed this post, and I cannot wait to see you for the next Halloween-themed post with the new kit “Magical and Mischievous.”

Kiss from France,

Adeline

Aimee's "Wonderful World of Disney" Memory Planner Spread!

Hey all, Aimee here to share a spread from my memory planner.

01_Aimee_2018_08_11.jpg

August is a special month for me, and especially this year. My husband’s birthday is August 5th, our 1 year wedding anniversary is August 10th and my 40th birthday is August 15th.

So I thought it was pretty important that I make a special planner spread! And when I saw this calendar layout in the WWOD Kit I just knew it was meant to be.

Now that I have the most important dates marked for this month, I can’t wait to see what other memories are made for me to cut and paste and add to this spread!

Do you have a month in your life that is flooded with wonderful things?

XOXO Aimee

Dianna's Weekly Planner Spread

Hey there friends! It’s Dianna, back with my weekly planner spread using the Hello Beautiful kit!


I used the pretty pastel papers to create this lovely spread! Aqua and pink are my faves so I concentrated on those shades and some black polka dots! It’s a great combo!!  To make this planner spread I cut out my paper to fit the dimensions of the boxes in my weekly planner insert. It was super easy and I just used my tape runner to add adhesive to the back of the paper and glued it in place!  I love the ledger style paper. It  worked perfectly to add some of my to-do’s. 

I also cut some of the paper into strips to look like washi tape and layered it in a couple of places.  To make the paper clips I simply hot glued the flair button and bow die cut to some gold paper clips.


A few embellishments from the die cuts and sticker sheet and all done! Oh, and I added a little layering on the edge with some ruffle lace too! 


Hope you like it! Have a beautiful weekend! 💗 
 

Dianna's Monthly Planner Spread and Tag Place Holder

Hello beauties! It’s Dianna, and I’m back this week to show you how I used the “Hello Beautiful” kit to decorate my monthly spread. I also made a tag page marker!! Here we go: 

For the left side of my monthly spread I started by filling the empty spaces with some yummy layers of paper from the kit!  At the top I used a piece of the Fairytales paper and two die cuts (the pink flower and the word die cut "Spring"). At the bottom I used some of the vellum and layered it with aqua and a “You are beautiful die cut”. The vellum is a new addition to the kit this month! It’s gold foiled and gorgeous! Under that I glued some frilly laces and then added some washi above and a couple of stickers where I had important dates. 

On the right side of the monthly calendar I used those flower die cuts. They are my all time favorite!  Under them I layered more of the Fairytales paper (both sides! It has a wonderful handwritten look text). Some more trims below, washi and a bow die cut I used as a sticker to mark a date! Here’s a look at the full spread: 

I also created a tag page marker! 

This tag is super cute! Used my favorite Fairytales paper again! I just measured it to be a little smaller than my actual pages. Layered on some of the black polka dot and the back of the aqua paper. This flower I cut from the “Enchanted Forest” paper and of course added some more lace! Above the layers I added the word die cuts and that cute birdie(another fave!)  I punched a hole in the top after adding a heart punched from one of the papers and strung some pretty trims through! These look lovely coming out the top of my planner!!! 

Here are a few detailed shots: 

Happy Friday! Hope you all have a beautiful weekend!! 

Xoxo,
Dianna