Lilly's Halloween Rosettes

Hey guys welcome back to the blog.. Are you guys ready for Halloween? I have really been enjoying creating Spooky mail. Today I’m sharing these super cute rosettes I made with the “Magical and Mischievous” kit.

I am totally obsessed because they combine a traditional look with that of “pasteloween,” which is super popular this year. I used the Tim Holtz rosette die. It’s my fave at the moment.

Also added some cute little spiders for a little something extra 🧡

You can either share these in happy mail or add them to projects or even make wands out of them.

IMG_4912.jpg

Well that’s all for now. Hope you guys have a great Halloween with friends and family! And always remember to stay safe 🎃

Solange's Magical and Mischievous Gift Wrapping

Hey guys! Solange here to show you a fun and unique way to wrap gifts using the “Magical and Mischievous” kit.

All you’ll need for this project is your gift and the kit, that’s it ! Easy, fun and super cute way to send someone a present.

image3.jpg

To start, wrap your gift with a 12x12 patterned paper of your choice then just have fun decorating using the ephemera pieces and fussy cutting images from the papers or dashboards like I did!

I always try to embellish the gift using the same images that are in the paper in a bigger scale so I fussy cut the spooky owl from one of the dashboards to match the background, giving it a fun cohesive look!

You can also add ribbons, trims and tassels to make it even more fun!

image5.jpg

I hope you got some inspiration and I can’t wait to see what you’ll create!

Carolee's Traveler's Notebook "Magical and Mischievous" Layout

Hey everyone! Carolee here with a new traveler’s notebook layout for you today using the new Magical and Mischievous kit Andrea created for Halloween!

My hubby and I took a quick afternoon trip to Disneyland to check out all of the decorations and Halloween items in the shops. We found this adorable popcorn bucket and picked one up. This picture makes me giggle. Someone told me that Ryan looks like he’s trying to get someone to try the poison inside! So, I figured using the Magical and Mischievous banner would work great as a title on this layout!

First up, I cut a piece of paper down so that I had two TN-sized sheets. Next up, I wanted to layer several papers underneath the Instax photo I printed. I love using the A5 inserts for this since the patterns are a bit smaller. I added a touch of pink as the mat and then haphazardly cut a bit of purple to go under that. Last, I added the title banner and glued it down to the page.

The cauldron square from the Hello October paper couldn’t have been more perfect so that went opposite the picture. I just glued that down and added a couple of staples to add a bit of gold to the layout.

Next, I wanted to add some orange. I used the pumpkin bucket die cut but while I was looking through, I saw the poison apple so I added that in there as well. Finally, I added some of the sequin mix to the page to add color and shine to the whole thing. I really like how well this quick and easy layout came together. I hope you have as much fun with the collection. Until next time, happy crafting!

Michelle's Halloween Banner

Hey there, crafty friends! Michelle here, and I’m back with a new project using the Magical and Mischievous kit from The Fairytale Club! I don’t know about you, but I’ve always wanted to be one of those people whose home is decorated for every season. And since I spend so much time in my home office, I thought I would take this kit of magical Halloween goodies and make a cute banner for my bookshelf!

I started by selecting five patterns from the 12x12 sized pages and cutting them into the banner pieces. Then I selected three cards from the cut-out sheet that coordinated well with the patterns I chose.

Then it was time for the fun part, which was to add all the trim and ephemera! This step always makes the biggest mess but it is also the most fun! I spread all the bits and pieces across my desk, and through trial and error, I see what works best.

I really like to play with different textures, which is something you can see in this project. Most of the banner pieces have cute ephemera bits, as well as some sort of textured elements, such as ribbon or the ever-so-cute pom poms!

1022181015d-01.jpg

After each banner piece was all done, I laid them all out and used hot glue to attach them to the orange and white string I happened to have on hand. Being a crafty lady is so fun! You never know what kind of supplies you may find in my stash.

The final step was to add the mini pom poms to the strand, and hang it up! I love how this came together, and it adds a little seasonal touch to the office!

1022180941a-01.jpg

I hope you enjoyed this fun and festive project! It demonstrates just how versatile paper crafting can be and I hope this inspires you to try something new. Happy crafting!

-Michelle

Kat's Halloween Flipbook

Hello Spooky Friends!

It’s Kat, and I am bringing you my second project as guest designer for the month of October. My focus has been creating projects that I will cherish for years to come. For my second project I have created a flipbook of sorts that I will be filling up with Halloween memories.

For the cover I choose this super spooky cute journaling card and layered it with some fun ephemera from the “Magical and Mischievous” collection. I used a flare button as a clasp to keep my flipbook closed with some twine.

Sometimes when we memory-keep, we can quickly run out of space to store all our treasures. I decided to make a smaller scaled project that would be easy to store. I trimmed my base to 5x5 squares for a total of 5 squares and adhered them together using 1x5 inch slips of paper. I then choose some of my favorite prints and trimmed them to 4 ½ inch squares and adhered them to my base for a total of 9.

After adhering all the Spooktacular papers I chose ephemera that would compliment each square. Layering and creating clusters allow each little square to come to life.

For most of the squares I left large areas to go back and add my pictures from Halloween day. I made sure to only adhere the edges of the ephemera to allow me to slip the pictures in and drape the ephemera over the pictures. Some squares I made into decorative pieces to tell the story of my album flipbook.

For the ephemera I mostly used the colorful and gorgeous images from the “Magical and Mischievous” collection but I also I sprinkled some of the fun foiled phrases. I just love how the “Happy Halloween” phrase is the perfect size for this flipbook.

When the flipbook is completely opened it just shows how super cute and fun it is! I can’t wait to fill it up with some cute memories from my Halloween. I hope you also create your very own “Magical and Mischievous” Halloween album flipbook. The perfect way to display all your favorite memories. Stay Spooky cuties!

Aimee's Halloween Layout

Hey all, it’s Aimee!

Are you a planner girl or a scrap girl? I am 100% a scrap girl, but I love planners. But really I’m just a paper lover. Today I’m sharing a mix of both worlds, using the “Magical And Mischievous” Happily Ever After kit!

I used the “October Calendar” A5 divider as my focal point for my scrapbook layout. Say What? That’s right. I used an A5 divider on my layout. I even got to play around with my stamps, as if I was a planner girl.

I first stamped the dates on the A5 divider. I then matted my photo with another A5 divider, the super cute purple ledger paper.

I added some foam adhesive to the back of the matted photo and adhered it over the calendar, just so you could see some of the dates.

I really wanted to use one of those pom-pom paper clips, but they are a bit puffy for a scrapbook layout. No problem, I just trimmed the back of the pom-pom to make it lay flat on my layout. I then slipped the “Magical and Mischievous” banner under the paper clip {I first added a bit of adhesive to the back} and then stapled the paper clip in place.

I journaled on some plain cardstock with my typewriter. I made sure there was enough space between each line/sentence so I could cut them a part. Once I had cut my journaling a part, I adhered it to my layout. I then used foam adhesive to adhere the candy and pumpkin die cuts.

And to finish off my layout with a little pizzazz, I faux stitched around the A5 divider with a white gel pen.

Do you ever use supplies that weren’t intended for scrapbooking/planning?

XOXO Aimee

Solange's Embroidery Hoop Pocket Decor

Hey guys, Solange here with a super fun, easy and fast project using the “Magical and Mischievous” kit! I was super excited when I got this kit and anxious to work with colors that are out of my comfort zone.

image1.jpg

For this project you will simply need an embroidery hoop that you can find in any craft store and your “Magical and Mischievous” kit.

To start out, I chose the papers that I wanted to use for the front and the back of the hoop. For the back of the hoop, I simply traced the outline onto the stripe blue paper and cut it out. I then glued it with hot glue to the back of the hoop. For the front piece I followed the same exact process and then just cut it in half instead so we can form a pocket.

Then the fun part, embellishing ! I used some of the ephemera pieces but I also fussy cut some of the images in the dashboards to use as ephemera.

The last step is to stuff the pocket with some crinkle paper and then add goodies inside! You can use this idea to send gift cards or to share your handmade embellishments, and maybe some treats as well!

That’s it! Super simple, easy and cute project to send to your penpals, give as gift or hang in the wall for the decor!

I hope you guys got some inspiration and I can’t wait to see what you’ll create. Xoxo.

Kellie's 4x4 Mini Album Mini Layout

Hello everyone, it's Kellie here to share a mini layout I created in a 4x4 mini album using the Magical and Mischievous collection.  These little albums are the best for documenting your memories.  They can be used for the one theme or many.  I decided that since my girls are getting older I would use one to document all their book week dress up days.

2018-10-11 13.18.41

We don't celebrate Halloween in Australia, not like it's celebrated in the USA.  But my girls once a year have book week where they get to dress up as a book character. It's so much fun to dress them up and see how excited they are and now that I only have one of three daughters doing it, as one daughters has finished her schooling and the other started high school where they no longer take part in dress ups.  So I thought it was time to have them all in the one place, like a mini album.

2018-10-11 13.18.48

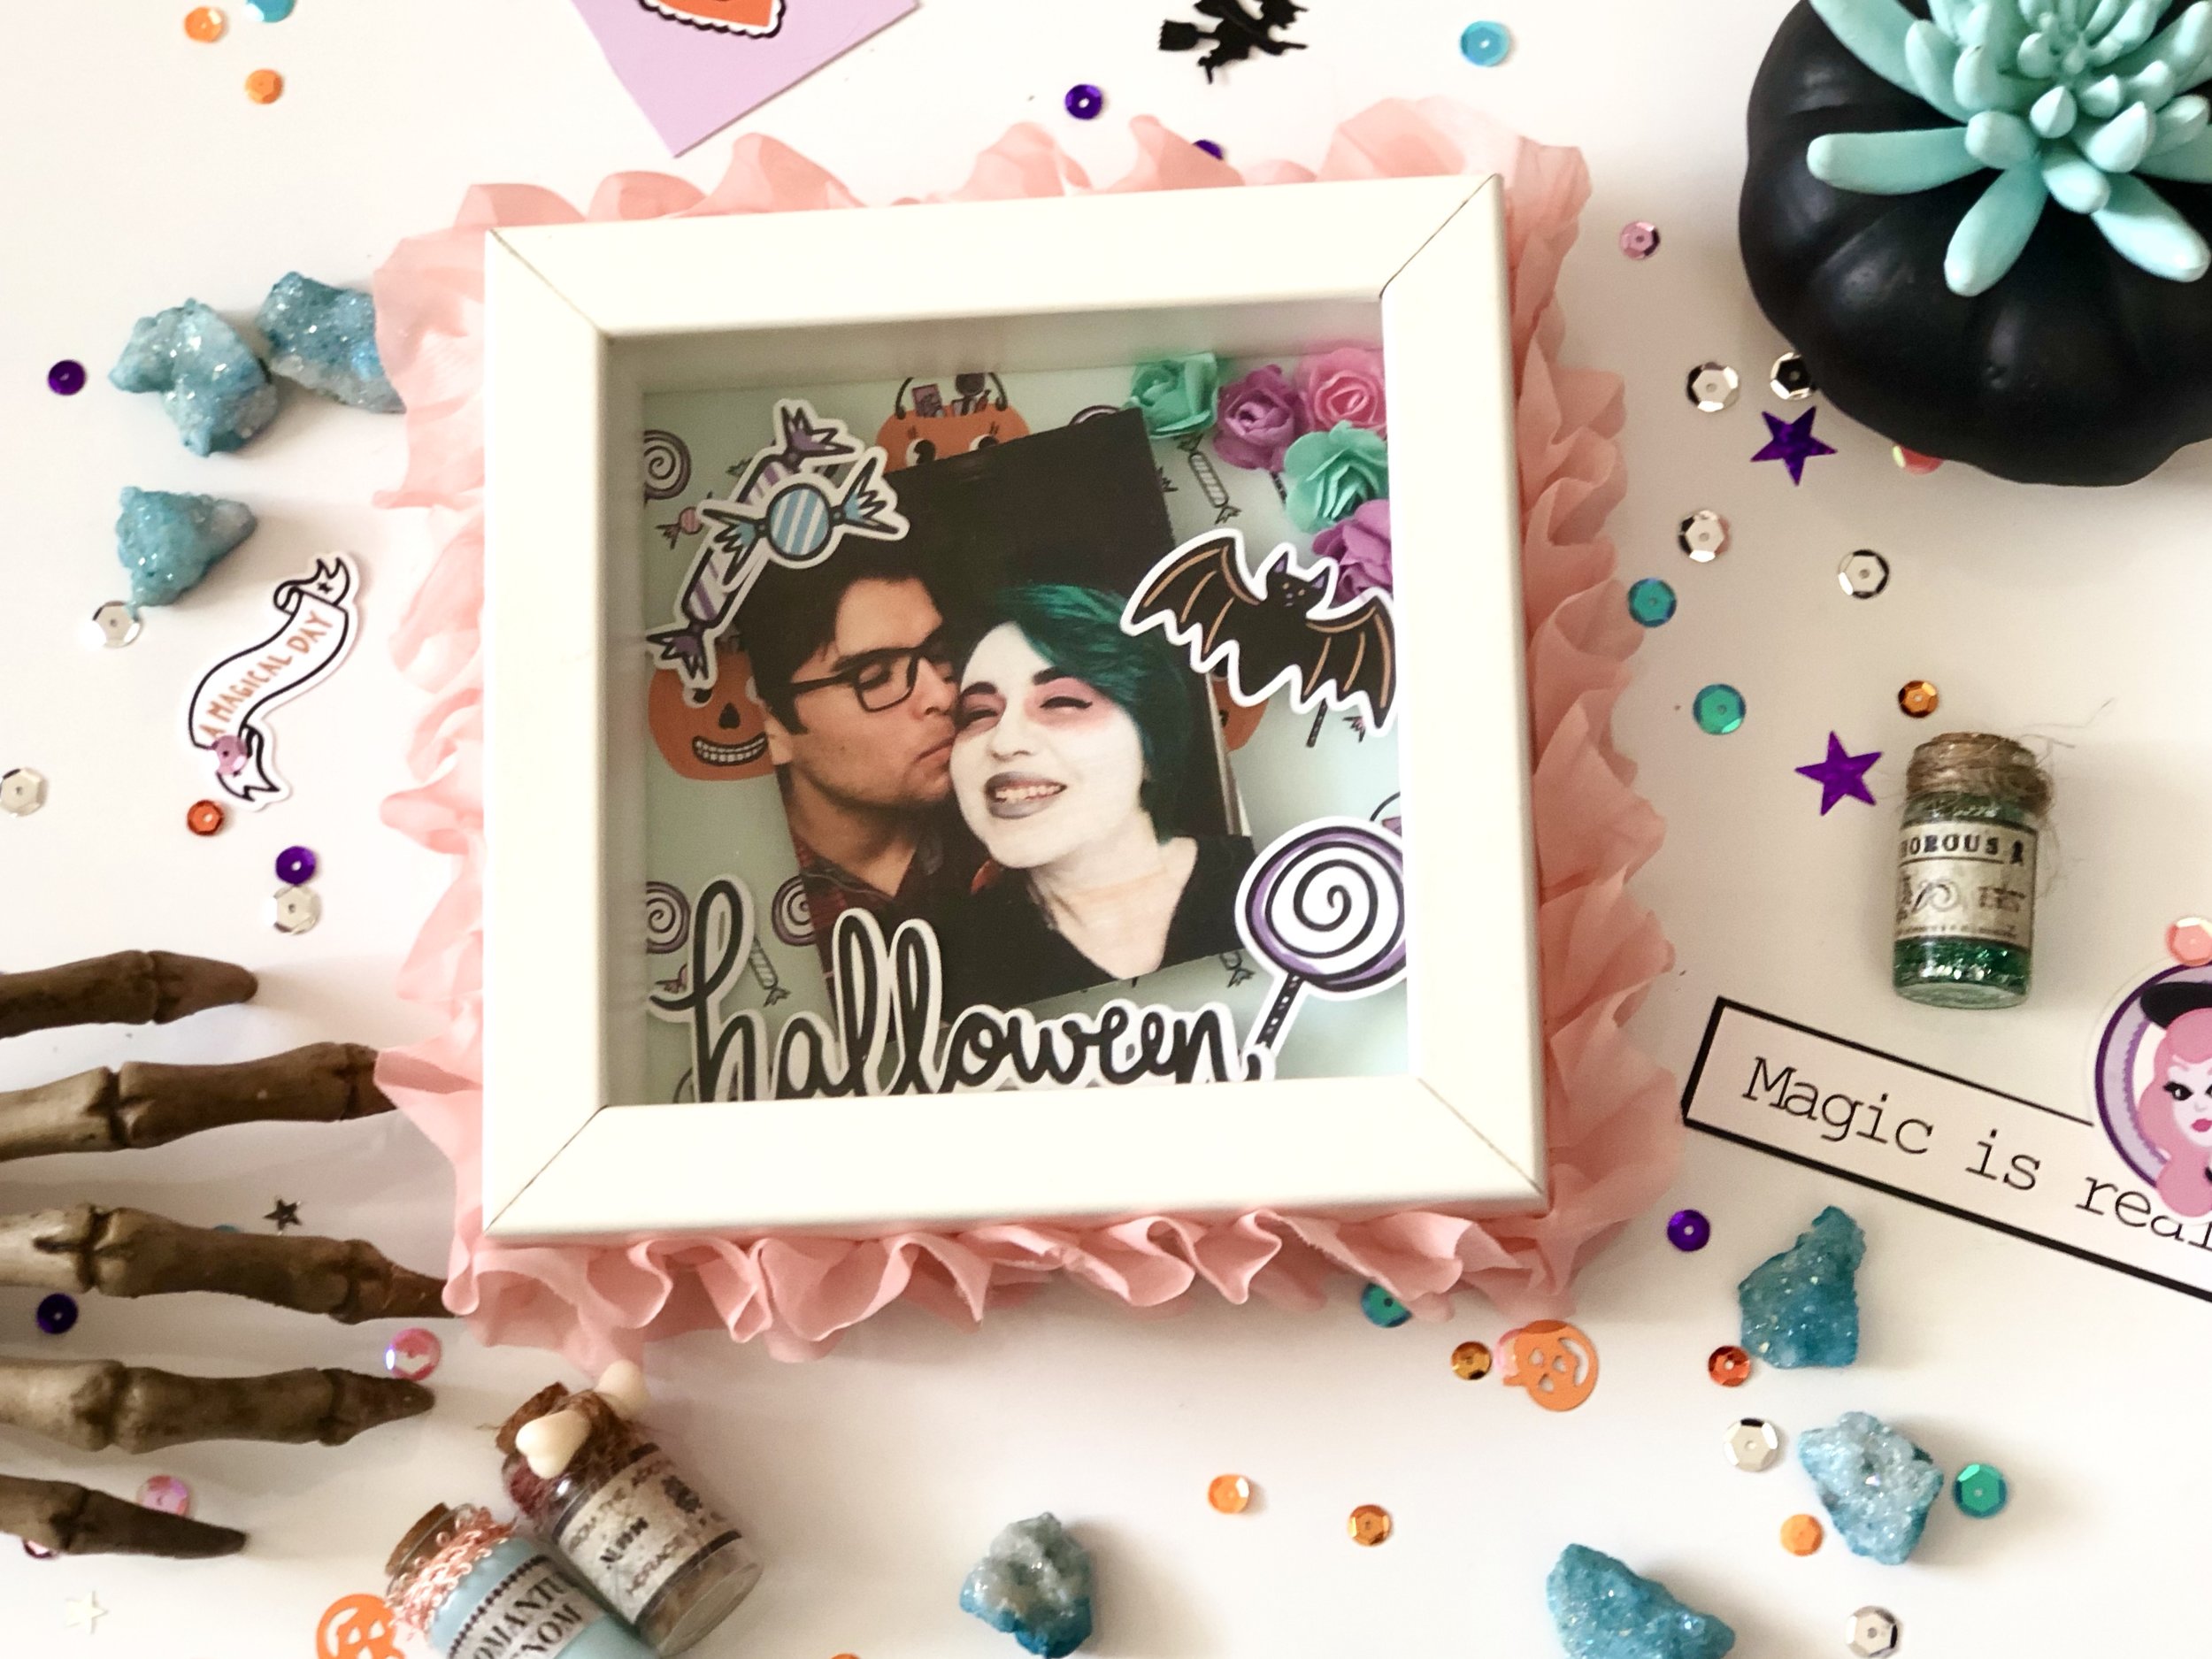
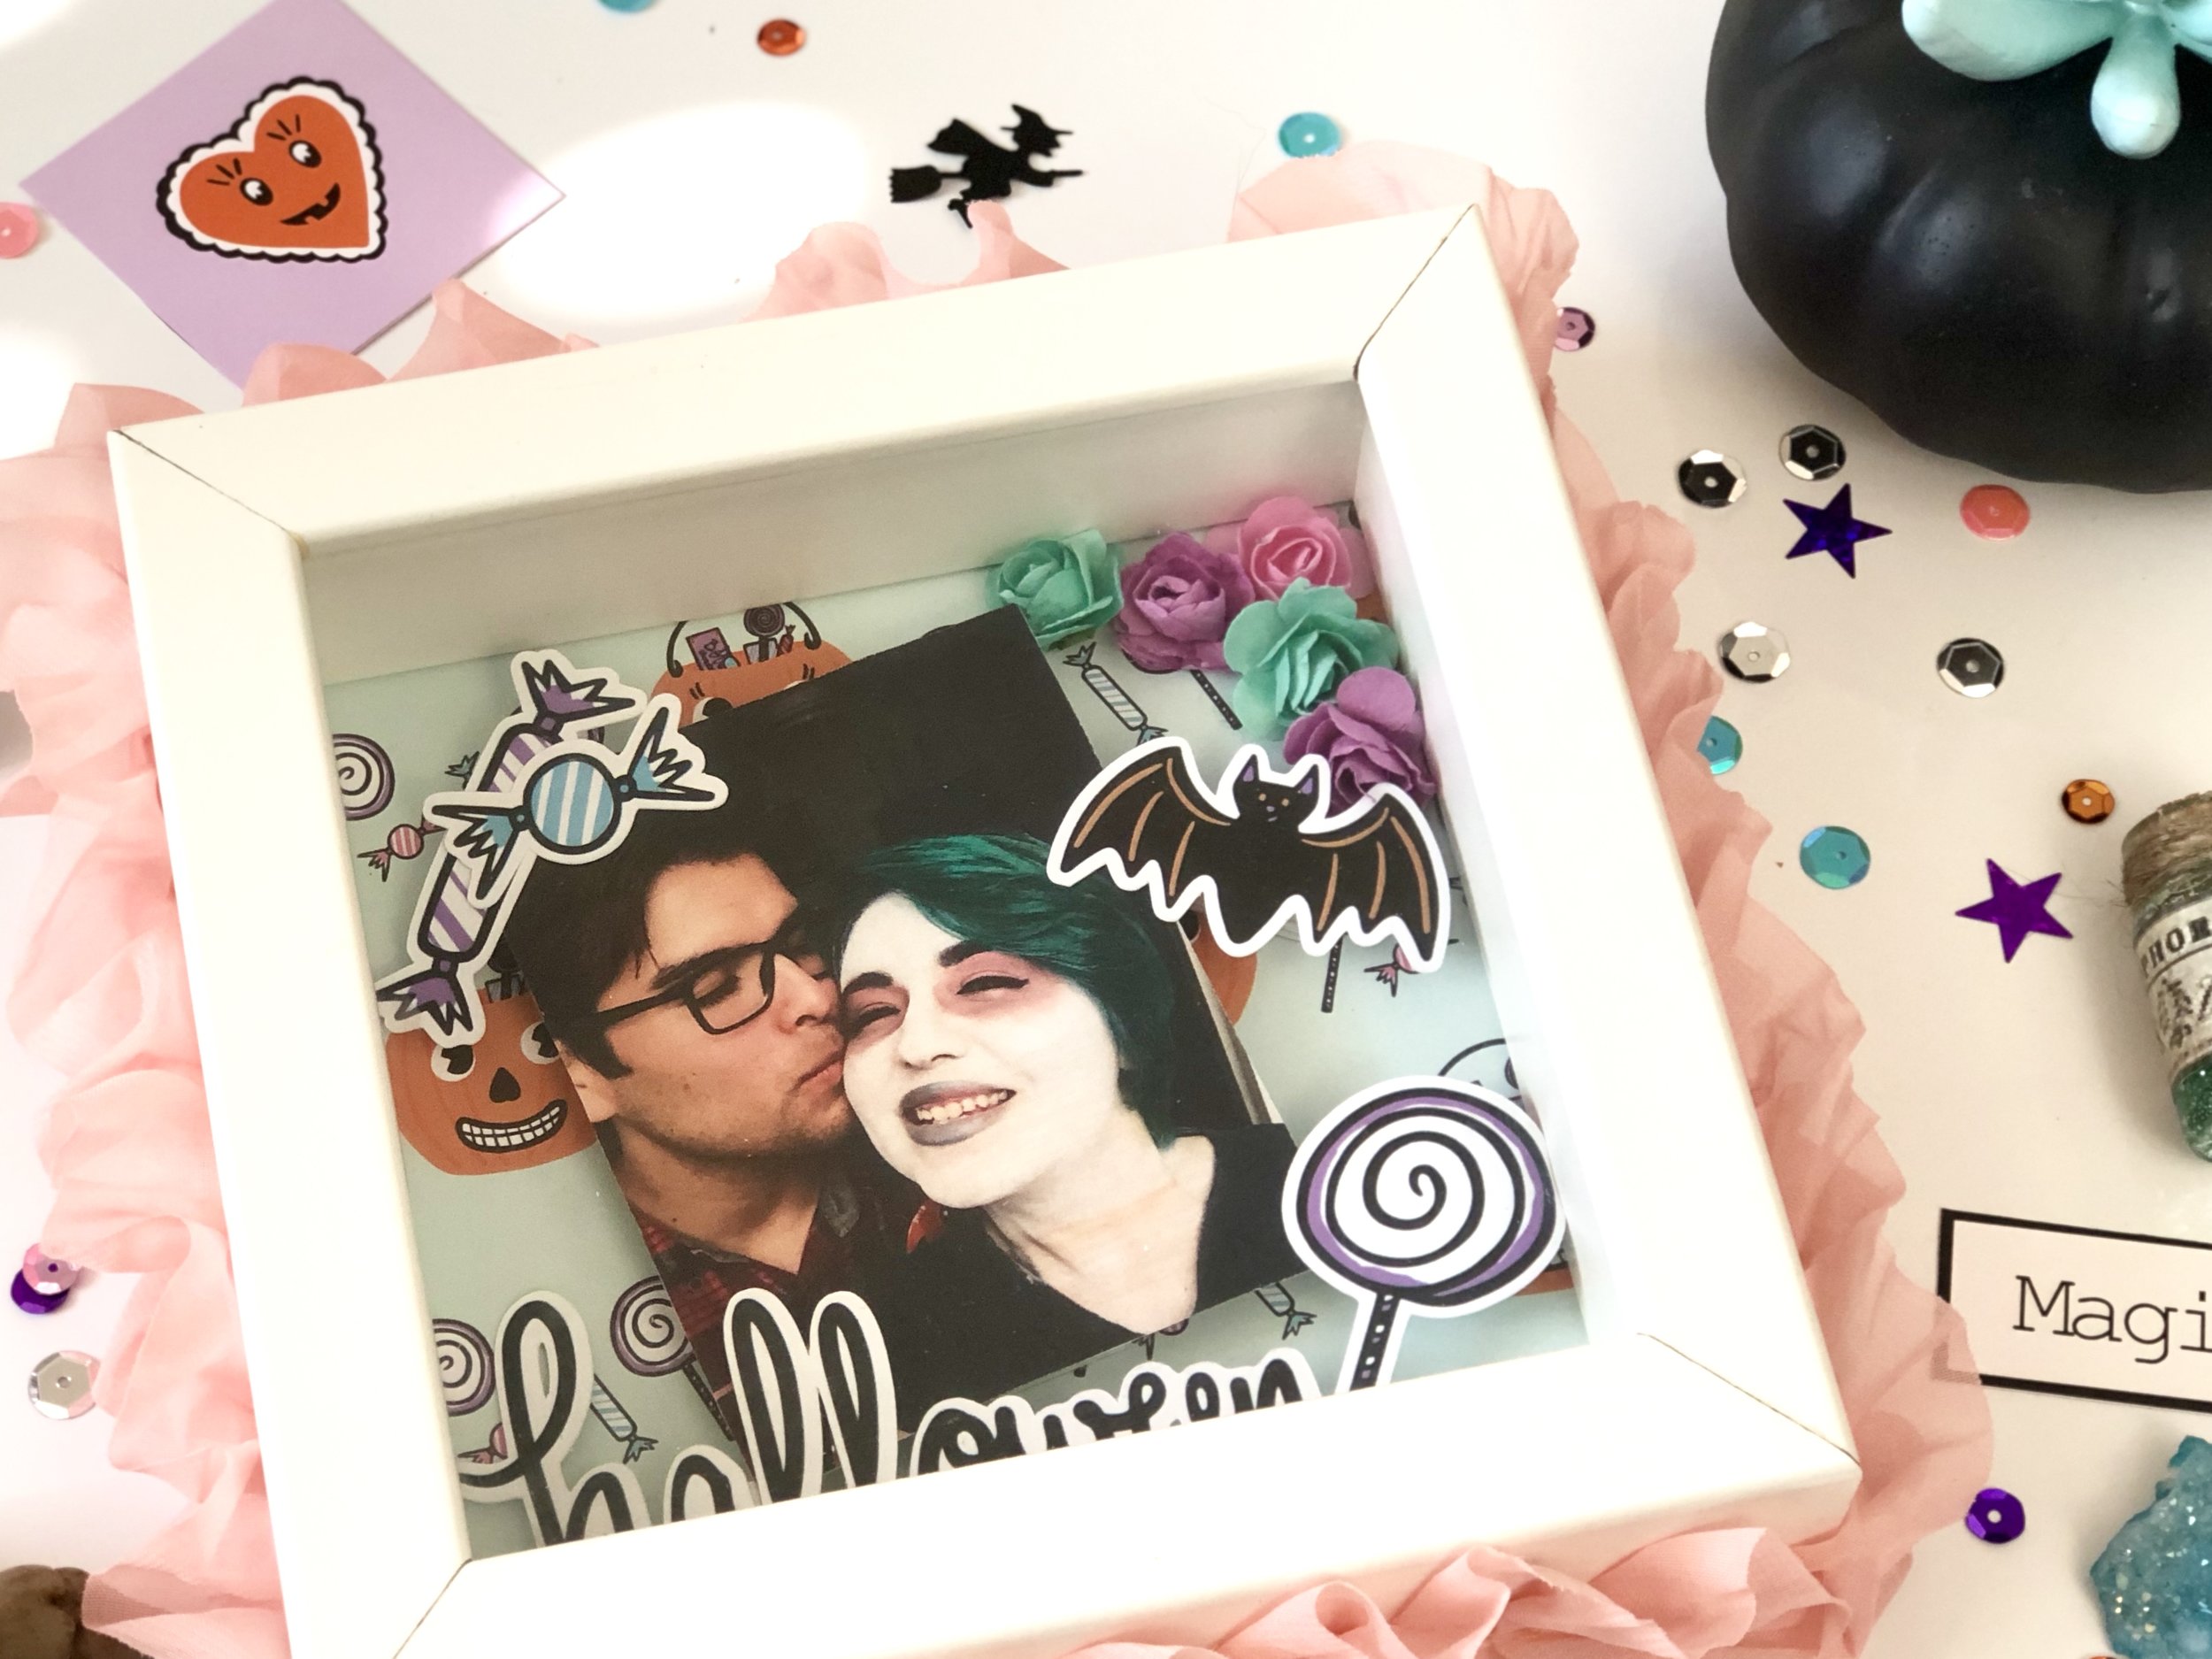
Do you know what I love about the Magical and Mischievous kit?  EVERYTHING.  The acetate sheet that comes with the kit is silver on one side and a purple on the back.  I used the purple as a backing the this little layout of my girls dressed up day from a few years back.  Harry Potter and a witch, the perfect match.

2018-10-11 13.24.23

I then layered around the instax photo with the die-cut shapes ephemera pack and used some left over strips from the card I made and shared previously strips.  I also used one of the little pom pom paper clips, HOW stickin CUTE are they?  I'm trying not to hoard the rest of the three from the packet of four.


2018-10-11 13.19.05

I grabbed a pocket that has 4 mini squares and cut up the 12x12 pattern papers and again used some of the die-cut shapes ephemera pack with a flair button.

2018-10-11 13.24.27


Kat's Halloween Shadow Box

Hello Spooky Friends!

My name is Kat, and I am the guest designer for the month of October. I am so excited to share with you the awesome and spooky cute crafts I have created using the “Magical and Mischievous” collection. The first project I wanted to conjure was a shadow box/memory keeping box.

IMG_7541.jpg

I adore shadow boxes because they are tiny time capsules that capture your work of art and simultaneously displays it in a bootiful fashion. For this shadow box I wanted to merge scrapbooking with it as well.

I love this ghoulish picture of my Wolfie and I, and I really wanted to capture the magic of it and preserve it for years to come. The “Magical and Mischievous” collection paired so beautifully with it and showcased the whimsy of this moment.

I started off with a 6x6 shadowbox (you can purchase them at any hobby store) and cut out a square of my favorite patterned paper, the super spooky cute pumpkin pail with sweet treats. I glued this to the backboard of the frame. I printed out the photo 2 ½ x 3 ½ and added 6 layers of foam squares to give it dimension. Tilting your image gives it even more whimsy.

I then picked some ephemera pieces from the collection, two candies, a lollipop, the black bat, and the Halloween word. I propped these up with 6 layered foam squares cut to size. This allowed all my pieces to be the same dimensional size. I paired the collection with some paper roses to finish off the inside of the memory shadow box.

IMG_7545.jpg

Finally, for the exterior of the box I added some ruffled trim in blush to complete my Spooktacular memory shadow box. I added the trim using hot glue. Incorporating fun elements, such as trim, gives your projects textures that bring it life.

IMG_7548.jpg

I hope you also create your very own “Magical and Mischievous” memory shadowbox this Halloween season. Bring a little spooky cute into your crafty space or office desk. Stay spooky cuties!