Kellie's Happy Mail Pocket

Hello everybody! The full reveal for our new collection, “I’m in Wonderland,” will be posted soon, and we are so excited to share it with you! In the meantime, we have a few projects to share using previous collections from The Fairytale Club. Here’s talented design team member Kellie Winnell with a cute tag holder and tags, featuring the Magical and Mischievous collection.


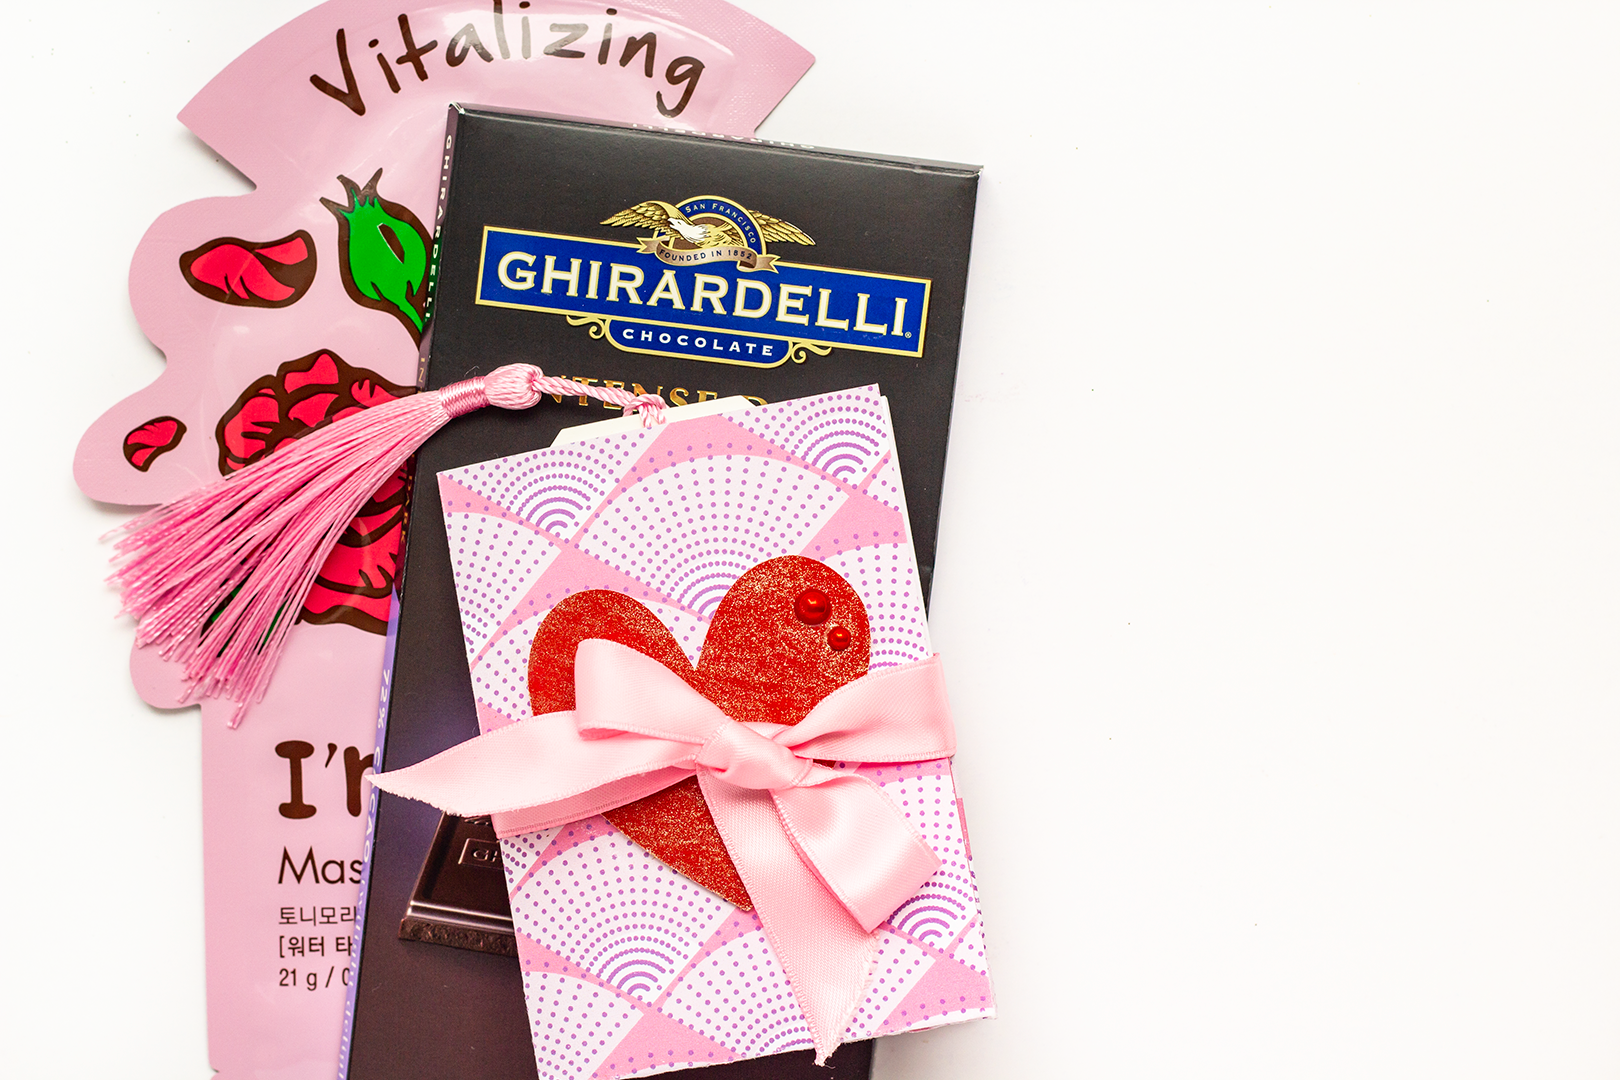
2019-08-02 11.05.36Hi there everyone, Kellie here today, it's been a while since I've come to share anything here, but that will soon change as I have some projects I've been working on.  For now let me how you this one.  2019-08-02 11.05.36Sharing something a little different from me today and to be honest this was a bunch of fun to make. So much so that I grabbed a different kit and created same again, more to come on that.  But for this one I grabbed the Magical and Mischievous kit.  So good, still one of my faves. ⁠


2019-08-02 11.05.36

I followed the youtube video from the talented @iamabsolutelyalice which was super simple to follow and LOVING the end results with the Magical and Mischievous kit that is still my all time favourite from The Fairytale Club, because @andreabethkedesigns nailed it.


2019-08-02 11.05.36I'm actually really happy with how this came out and might even start looking to make a bunch to send out to make someone day.  But don't hold me to that, I think I'm going to start a lot of things, haha!

Do you send happy mail?

Kellie's Nap Queen Layout

TFC_KIRA_03
Hey there crafty people.  It's Kellie here with you again to share a mini layout in my pocket page notebook, using the NEW and gorgeous, Beautiful Dreamer kit.  I wanted to keep this rather simple to keep the focus on the photo and my daughters beautiful hair colour and this kit allowed for just that.
  TFC_KIRA_01For this layout I wanted to try something new, new to me.  There are so many amazing hearts in this kit and I LOVE that!  I decided to have three hearts on the pocket going down in a line, vellum in the front and the cardstock hearts backing them.
TFC_KIRA_01I then got out my old sewing machine and.................. the top one moved, ugh.  I didn't let it stop me and the other two hearts came out perfect.  The old, two out of three ain't bad.

The sticker, NAP QUEEN could not had been more perfect for this teen of mine.
TFC_KIRA_01
I decided to use the bottom strips of the 12 x 12 pattern papers as washi tape, they are truly perfect for that use.

Aimee's "Eat Sleep Scrap Repeat" Layout

Hi everyone, it’s Aimee! It’s been awhile since I’ve posted. But I am so excited to be back and sharing this layout with you, using the brand new kit Beautiful Dreamer

So basically just scrap lifted this page from Paige Evans! I knew this cut file would look so awesome with the Beautiful Dreamer Kit!

To create this page, I started off using a cut file from Paige Evans. You can find the EAT SLEEP SCARP REPEAT cut file here.

I cut the it using plain white cardstock, I then used 7 different papers from the BD kit. Actually, I just used 4 different sheets that are double sided!

I separated the cut file and cut EER + LAT from “Spring Dream”, APE + SRA from “Her name is Aurora” TSP from” Beautiful Dreamer” and heart CE + EP from “Believe”.

 I backed the cut file and then placed all the letters inside the cut file. I then ran the whole cut file threw my sewing machine for a bit more dimension.

I used “Flora Fauna, and Merryweather” 12x12 as my base. I used 3-d foam adhesive to “POP” the cut file off the page. I used a border punch to punch the bottom of “Make it Pink, Make it Blue”.


I used a square instax photo for my layout. I layered it with a pink frame from the Variety pack, and used mini staples to secure it in place. I also layered the castle die-cut and a vellum butterfly die cut from the Variety pack over my photo. 

To finish off the layout I layered the blue bird and yellow butterfly from the Floral Emphemera kit under the cut file for dimension.

I love how the 12x12 “Flora Fauna, and Merryweather” paper helps give the layout depth and dimension with the faux paint and handwriting. It makes all the layers POP! 

Do you ever take advantage of the base papers design and incorporate it into your design? 

Thanks for stopping by, 

XOXO Aimee

Kellie's Pocket Page Notebook Dreamer Layout

TFC_MAY_02

Hi there Fairytale Club peeps, Kellie here with you today to share a mini layout I create in my smaller pocket page notebook.  I think if you've been following along here and would had noticed I have a thing for this style of crafting, FUN!

For this layout I've used the NEW Beautiful Dreamer kit, that is honestly just a dream to be able to create with.


TFC_MAY_02

My eldest has started taking photos again.  She's had an eye when it comes to photography and I benefit, because her favourite or only real subject that she can have on hand are her sisters, WIN for me.

Before this kit even arrived on my door step and I was checking the delivery update daily.....  Come on, I know I'm not the only one that stalks their Fairytale Kit right?  I already had plans in my head on what I wanted to create and these photographs were top of the list.


TFC_MAY_02

Did you see that this month there is something new?  The chipboard alpha's!  Are they not dreamy?  Confession time, I used the "q" as a "b", honestly it was a mistake and once I realised it didn't bother me as it just worked. I decided to keep these layout's pretty simple.  I'm loving the sentiments within the sticker sheet this month.


TFC_MAY_02

To do the pocket I got out my trusty fuse tool and once I was happy with where my photo was placed that I've gone back and front, I fused around it with a metal ruler.  Added sequins in and then fused it up.  BAM, done.  Sounds simple right?  You have no idea the amount of sequins I get everywhere, haha.  But the result is just too good not to lose or wear a few sequins.

i didn't want to sew straight into the pocket page paper.  So I decided to stick down the strips of paper onto a spare bit of cardstock, sew with my sewing machine, trim up and then stuck it down into my pocket page notebook.  This works really well for those hard to get to areas with your machine.


TFC_MAY_02

There you have it!  I have another layout coming next week that I can't wait to share with you all.  In the meantime if you haven't signed up for your kit yet, you can do so, HERE.

Remebering December with Kellie

Kellie here with you again to share another creation I made using the December Dreams kit, because you get so much within your kit, you really can just make and make and still have some left over and I LOVE that about these kits.  While the collection isn't available anymore as a whole kit, you can still get all the elements of the kit separately, except for one of the papers. 

DD_TFC_KELLIE_1Ok back on track.  I'm going to share with you a 6x4 layout I created x two for an album I'm determined to get finished this year.  It's a Remembering December album that is based on Christmas pasts and present.  i made a list to go off and have been working my way through.  This kit from The Fairytale Club couldn't had been a better fit.
DD_TFC_KELLIE_1What I love most about this kit is the colour theme.  Pink and red was actually the colour we went with on the tree for 2018 and I'm actually 80% sure the kit had a bit to do with my change from my traditional green, red and gold theme.  Tree looked amazing.  If you haven't already, subscribe! Each month the kits keep getting better and better and you won't want to miss them.
DD_TFC_KELLIE_1To create this layout I actually kept it rather simple.  What I love about the kits each month is there is always one or two 12x12 pattern papers that actually has cut outs, they are my FAV!  Like this Candy Cane - it works so well as a little flip card to then have the day number on the back and not taking it away from the photo or the pattern paper with the red scallops that I used to then add the journaling card, also from the cut out!  Before I go can we all agree the gingerbread man is the cutest!
DD_TFC_KELLIE_1

Andrea's "December Dreams" Holiday Planner Set-up

Hello there everyone! It’s Andrea here, and today I want to share with you a fun planner set-up using the new "December Dreams" collection/kit!

I absolutely love setting up my planner for the holidays and since I start my holiday season in November (because I like to include my Thanksgiving plans in with my "holidays" stuff), I decided to go ahead and set up my planner using "December Dreams" now so that I could start getting things ready for my holiday-time!

I used the A5 decorative planner pages and punched them to go in my platinum Carpe Diem planner. For the front dashboard page, I used the Sugarplum Fairy planner page and added a clear transparency on top, and between the two sheets I sandwiched some of the matching sequins that come with the "Happily Ever After" kit version of "December Dreams." I did this so I could create a fun shaker page! I love shaker pages like this for my planner! They are easy to make, and all you have to do to close everything up is just stitch around the edges. I used a zig-zag stitch on my sewing machine and some red thread. I think this dashboard came out really cute!

And to finish things off on my dashboard, I just added a little paperclip with a little label from the cut-apart sheet and some ephemera pieces (like the gingerbread man, the word "merry," and a little peppermint) to it on the bottom right corner. This just adds a cute, extra jolly detail!

For the pockets in the front of my planner, I just used different 3x4 cards from the cut-apart sheet and placed them here and there to my liking, and then I also added in some of the smaller cut-apart pieces as well as some pretty die-cuts from the ephemera pack. I added a few paperclips to keep things in place how I wanted, and also to add some more dimension and texture.

For added depth, I placed a decorative pink pom-pom paperclip at the top (from our decorative paperclips pack) and I also created a few of my own decorative paperclips by attaching some of the adorable flair that comes in the collection to some simple gold paperclips.

And for some extra glitz and glam, I added in the big glitter-snowflake that comes in the variety pack to the front bottom pocket...and I added in the little silver snowflake charm to one of the top pockets as well...so cute!

There are more decorative pom-pom paperclips as well as some of the flair paperclips that I made added here and there in my planner, marking different pages. They are all along to top and you can see from the front how they look like pretty tabs...choose one to turn to particular and important pages in my planner.

And finally, I added to the rings the beautiful gold key to the four realms that comes in our new variety pack. It looks so gorgeous and special! I added a December 25 tag from one of our cut-apart sheets to it by just threading it through the pink tassel that comes with the key and I also created a little snowflake charm dangle using a gold paperclip and one of the clear crystal snowflake beads that comes in the variety pack too!

And for a last and lovely touch, I placed the gold key transparency sheet in the back of my planner...just because I think it looks so cool and magical!

Alright, I hope you like how I setup my planner for this holiday season and that I gave you some good tips, tricks and ideas for your planner set up (or maybe for a Christmas mini album, or a December Daily)! Hope you all are having a happy holiday-time!!! Hugs and remember to live your life as a fairytale (especially during this magical time of year)!

-- Andrea

Founder/Creator/Owner of The Fairytale Club :-)

Lilly's Halloween Rosettes

Hey guys welcome back to the blog.. Are you guys ready for Halloween? I have really been enjoying creating Spooky mail. Today I’m sharing these super cute rosettes I made with the “Magical and Mischievous” kit.

I am totally obsessed because they combine a traditional look with that of “pasteloween,” which is super popular this year. I used the Tim Holtz rosette die. It’s my fave at the moment.

Also added some cute little spiders for a little something extra 🧡

You can either share these in happy mail or add them to projects or even make wands out of them.

IMG_4912.jpg

Well that’s all for now. Hope you guys have a great Halloween with friends and family! And always remember to stay safe 🎃

Lilly's "Magical and Mischievous" Embellishment Book

Hey Guys, Welcome back to the blog!! Happy October!! Who’s super duper excited for Fall and all the holidays to come?! I totally am! October is def one of my favorite months - not only because of Halloween but because it’s my daughter and mom’s bday month, 🤗 so there’s lots to celebrate! 🎉 Well enough about me lol. Today I have a spooky embellishment book to share with you guys, using the latest kit released by The Fairytale Club, “Magical and Mischievous.”

IMG_4568.jpg

If you guys haven’t gotten your hands on this kit to play with during this season, what are you waiting for?? It’s a super cute kit and easy to create with.

I incorporated tons of the papers and ephemera from the kit to decorate the book. If you want to see a tutorial on how I create these books, I have one up on my channel. They are super easy and fun.

I filled it with a bunch of embellishments I created for Halloween happy mail.

Well I hope you guys enjoyed the pics! Be sure to try out this form of happy mail for your own pals.

Happy Spooky Crafting guys.. See you on my next post 🧡