Adeline's Weekly Layout using "Tiki, I Love You!"

Hi my fairy friends,

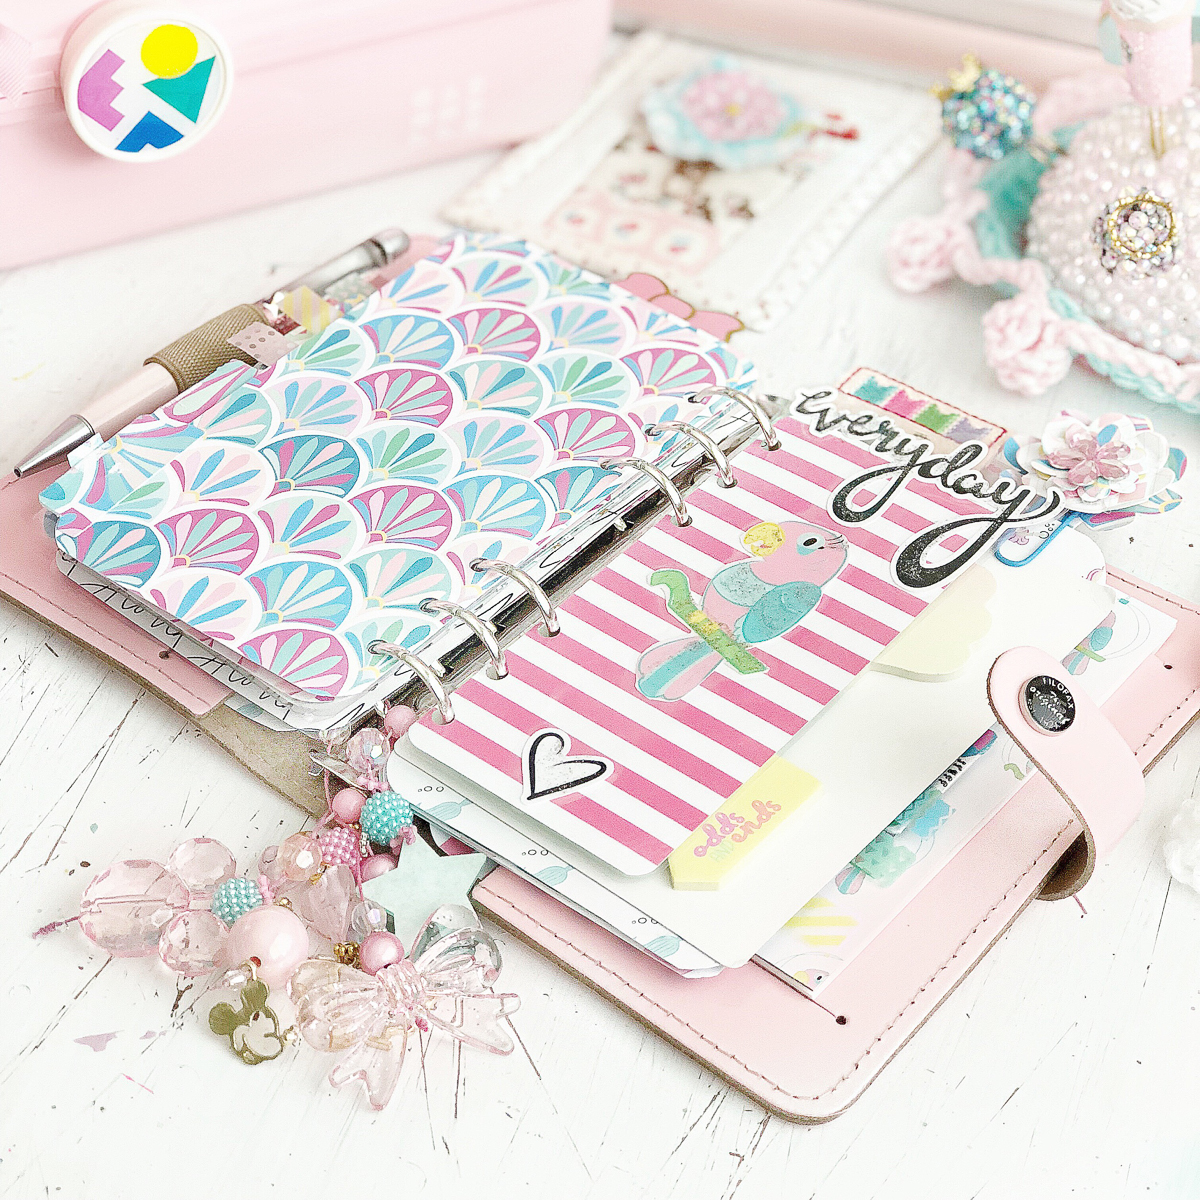
It's Adeline here today! I hope you're fine. Sunny days may be gone, but in my planner it is still summer thanks to the “Tiki, I love you” kit!!!!!! I made my week layout with it.

Tiki week layout 1.jpeg

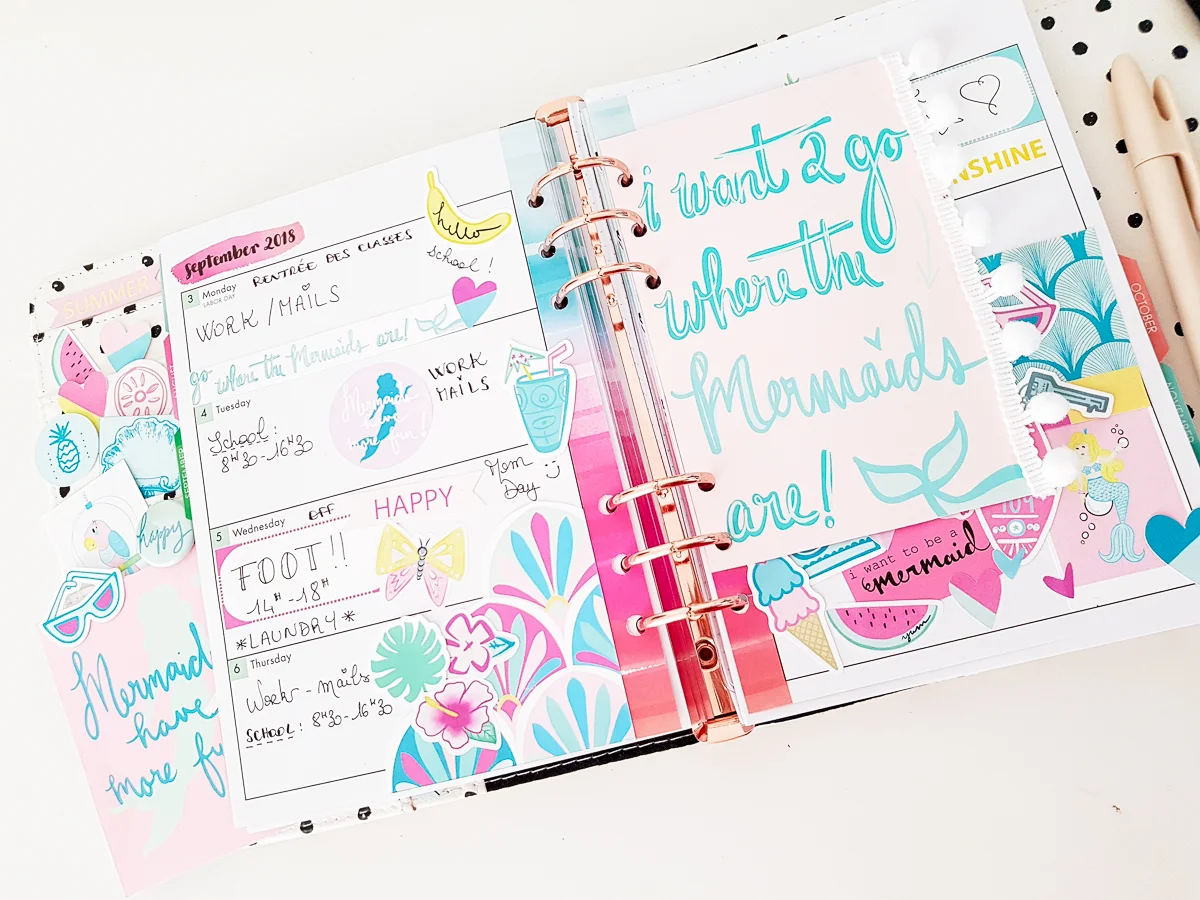
The bright colors and the trip theme are good because this weekend we are going to an amusement park called Walibi!! This name seems tropical but it is in Belgium!! LOL

Tiki week layout 2.jpeg

I knew the kit was going to be great for the trip.

What I like to do with my weekly layouts is to put pretty things that make me want to work or to accomplish my daily tasks. Do you do that, too?

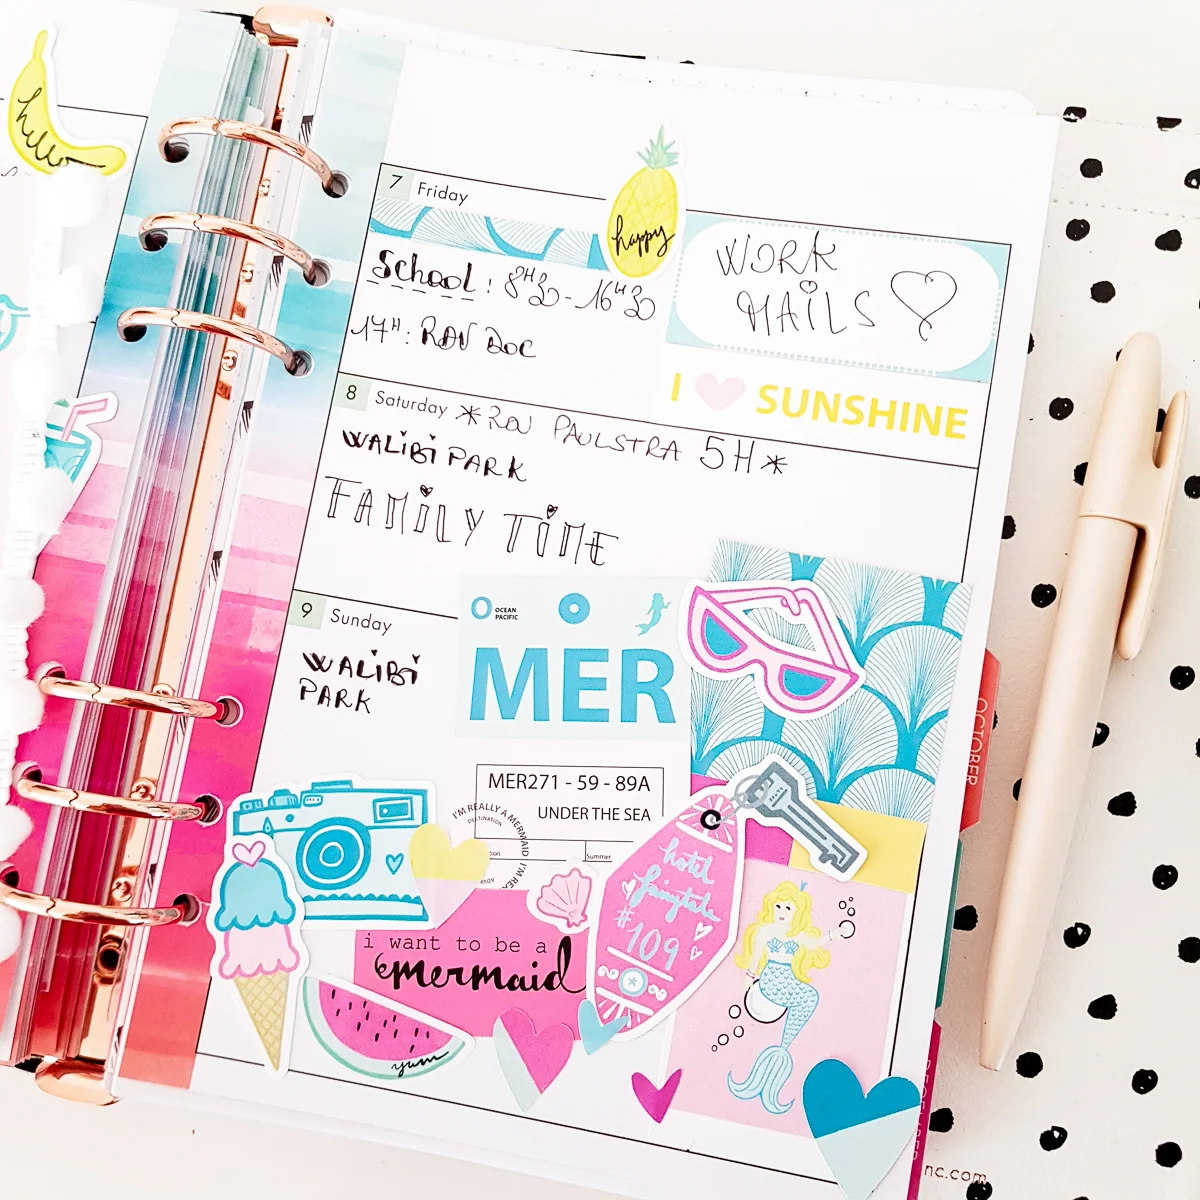
I used so many elements from the kit, including pieces of paper I cut and stickers and ephemera that I’ve accumulated.

I also cut out the project life card with a perfect quote : "I want 2 go where the mermaids are!" and used it in my planner - I just added a pom pom ribbon.

I wish you a good day, and I’ll see you soon for another post.

Tiki week layout 7.jpg

Kisses from France,

Adeline

Michelle's "Hello, Beautiful!" Greeting Card

Hi there, crafty friends! I recently got inspired to make a bunch of greeting cards, and I’m happy to share this one with you using digital printables from the “Hello, Beautiful!” collection from The Fairytale Club. A friend of mine recently started graduate school and her first week was a bit rough, and I knew that a whimsical card is just what she needed

She and I have been friends for a long time, and we have a lot in common. But one of the things we differ on is a love of sparkles. As for me, I can’t get enough, but she’s not so into glitter and girly things like I am. I remembered that the “Hello, Beautiful!” kit had some black and white elements that I could layer to make a pretty card.

0911180948a-01-01.jpg

I wanted to keep this pretty simple, so I didn’t add too many elements or color, and I knew the “Fairytales” paper would make the perfect background. Also, I thought that vellum inside the frame would be a great way to kind of block out the text a bit, but not completely, and I love that look. Finally, I added that bit of leaf trim on the side and voila!

0911180949-01.jpg

I love how this card turned out and I can’t wait to start another very soon!

-Michelle

Magical and Mischievous Collection Sneak Peek!!!

Hello everyone :-) It's Andrea here. And I am so so excited today to share with you our next and newest collection, "Magical and Mischievous"! And yes, you probably guessed right, it is our new Halloween collection. Yaaaay!!! I absolutely love Halloween!!! It is my favorite holiday, and the fall is my favorite season, and October is my favorite month...that's a lot of favorites! It all means so much to me and so of course, working on a collection for it also means so much! I really put my heart into this, and I really hope you love it as much as I do! "Magical and Mischievous" is filled with incredible, adorable, and, it goes without saying, oh so magical things! This collection is all about the magic, and you feel it when you look at it. There are witches and spell books, cauldrons and black cats, wands and stars, and so much more!

Magical and Mischievous - Sneak Peek-68.jpg

For this collection, as with all the ones I design and create for our Fairytale Club kits, I was inspired by fairytales. This time, I was inspired by a few different ones that I think best fit the feeling of magic and childlike wonder that I want to convey for this Halloween. I was inspired by Tim Burton fairytales like "Nightmare Before Christmas" but also other classic stories he has told and his specific love of all things 50's and 60's retro.  You can definitely see all the fun retro in the collection for sure! But first and foremost, I was inspired by J.K. Rowling's more modern, yet still classic fairytale of "Harry Potter" and the magical world of Witchcraft and Wizardry that she created! I wanted to create a mid-century modern magic look where the main concept is Halloween in the Wizarding World.  Specifically, I wanted to create the kinds of things you might see on cards and wrapping paper and decorations in the Wizarding World during that retro era at Halloween-time! I kind of merged these ideas in my head and came up with the "Magical and Mischievous" collection which you see a sneak peek of here today!

I love the cool retro prints and how boldly they work together to bring such a vibrant and eclectic and whimsical look! And I super love the adorable witches and cats (who are also either transfigured witches or someone's purrrrrfect patronus)! I love the jack-o-lanterns that wink and smile at you (as if they're under some magic spell)!  I love the fun little owls (who are clearly there for a party and not just to deliver mail).  And I love all the yummy candy (which was probably purchased at Honeydukes)! And I love the fun colors in this collection -- the classic orange and black paired with some fun pinks and aquas and greens and purples! I love everything about this collection! It is filled to the brim with Magic and Mischief, and I hope it speaks to you this Halloween! I hope it says, "Go, make something awesome," because 'magic is something you make!!!' 

Violet's "Tiki, I Love You" Planner Bookmarks

Hi! Violet on the blog again today, and I wanted to share how I used the "Tiki, I love you" kit in my ring bound planner.

image1.jpg

I used the journaling cards and card stock to make planner book marks. I trimmed the parrot from a journaling card and added it to card stock. I added some glitter to his feathers, because he needed to be a little extra. He’s so stinking adorable!

I use them inside my planner so I know exactly where I want to open my pages. I used the "everyday" word ephemera on top and laminated it, before I punched and placed it in the perfect spot.

Here is a top view of the planner bookmark. And below, you can see how I used the sunglasses ephemera as a tab for the top of the other bookmark. It just adds that little extra cuteness and a good way to use up your ephemera.

image6.jpg

I absolutely love the "Tiki, I love you" kit. The colors reminds me of summer, and all the tropical vibes, from flamingos to parrots and mermaid, made it a planner's paradise!

Violet

Floral, "Tiki, I Love You" Paperclips with Violet

Hello! Violet here, and today I will be showing you how I used the "Tiki, I love you" kit to make these floral paperclips.

I love to use every bit of the kits and don’t want any of it to go to waste. I use my small desk die cut machine and scraps of paper, along with a floral die cut.

First, I cut out all the pedals and leaves, using all scrap pieces from the Tiki I love you kit. I grab some paperclips and the flair buttons.

image3.jpg

I begin to layer them together and pick out the flair button that would go best with the flower.

I love how they look so much. I want a whole Tiki I love you bouquet!

image5.jpg

Here are the floral paper clips in my planner. They are perfect for that special touch to any planner and just one more way to meep your spot in a fun and creative way. Thank you to everyone who took the time to stop by the blog today. 

Violet

Solange's Gift Wrap Using Tiki, I Love You

Hey guys! Solange here with a super fun project using the “Tiki, I love you” kit. When I swap happy mail I like to go above and beyond because I believe that presentation is very important. For today’s project I wrapped up a few goodies for a penpal using the 12x12 papers in the kit. After wrapping them I just added some gold glitter tule and some pretty mint trim. To top it off I added a mermaid that I fussy cut from one of the dashboards and then also added a bunch of cute trims which gives it a really fun touch.  

image1-2.png

For the second gift, I just wrapped it using one of the papers again and then added a pretty gold doily and a butterfly that I fussy cut from the dashboards that come in the kit. I used foam tape to give the butterfly some dimension and to make it stand out! 

image2-2.png

This was such a fun and easy project and it will definitely bring a smile to the recipient. 

I hope I’ve inspired you to take your wrapping to the next level using this beautiful kit and I can’t wait to see what you guys will create. 

image3.png

Kellie's Pocket Page Notebook with Tiki, I Love You!

Kellie here again with you to share a layout I created using the Tiki, I love you kit in my pocket page notebook.

TFC_TN_01

I literally have so many of these awesome pocket page notebooks that I have a few that are themed.  This one has been all about using the kits from The Fairytale Club.  It's so fun to look through.  It's also mainly based on my daughters, even better.  I love memory keeping in so many different forms.  I also love getting the 12 x 12 pattern papers in The Fairytale Club kits and cutting them up to 4x6 and 3x4 for pocket pages or in this case 3x3.

TFC_TN_02

One thing I'm not much of is a planner girl.  I mean I do have two planners, but not the do it up and make it pretty type.  I wish I did.  They are more like a mess, haha!  Why am I talking about planners?  Well the planner inserts are PERFECT to add into your travelers notebook and with a range of designs and quotes, you can't go wrong.  I really liked this quote and knew instantly I wanted to use it and Heidi's favourite colour is blue, so it made sense to have a photo with her in it.  So I looked over some oldie instax photos and found this one from 2015.

TFC_TN_03

Honestly I love, love the die cuts on this release.  I don't want to run out, but can't stop using them, haha.  it's a dilemma.  Also a side note, you don't always have to have summer or beach themed.  This photo was taken in our Spring time! 

Michelle's Tiki, I Love You Traveler's Notebook

Hi, everyone! Michelle here, back with another project using the “Tiki, I Love You” kit from The Fairytale Club! This time I decided to use these fun supplies to make my own pocket sized traveler’s notebook. I had some spare pleather lying around (who doesn’t, am I right?), and I’ve always wanted to try carrying around a notebook of this size, and I thought this would be the perfect way for me to try it out.

0819181722-01.png

Here are the supplies I used to put this together:


  • Pink fake Leather for the inner lining

  • Tacky glue

  • A 12x12 sheet from the “Tiki, I love you” kit

  • Clear holographic sticker paper

  • Fabric stabilizer

  • Elastic

  • A box cutter (An Exacto knife may work, I just think that the box cutter is more heavy duty, and was able to cut through the leather better.)

  • An awl

Like I said before, I knew that I wanted a fairly small notebook, so I didn’t want to make this too large. I cut the leather and paper down to 5.25” tall, and 9” wide. That way, once you add paper and inserts and folded it in half, it was only about 4” wide. From there, I adhered the stabilizer to the back of the pleather.

0819181706-01.png

I probably could have glued the paper to the back of the pleather directly, but I’ve found that when I use tacky glue, it can really warp the paper. So by using the fabric stabilizer, which is sticky on one side, it can hold the fabric and the paper together well. Once the paper and fabric were attached, and the glue was dry, I decided to add a layer of clear holographic sticker paper on top of the mermaid print. This adds a cute bit of sparkle to the cover, and it also made it less susceptible to water damage, since the sticker paper is a glossy kind.

0819181710-01.png

From there, I used the awl tool to put holes in the cover where I wanted the elastic to go for the binding, and for the closure. To determine this, I found the halfway point in the width, and put holes 0.25” to the left and right of that point, at the top and bottom of the notebook. This gives me two elastics to use to hold a notebook.

I finished this project by adding a front pocket, making a small notebook, and then adding a little folder to the back, making it easy to take sticky notes, die cuts, and washi tape on the go!

0819181711a-01.png

I’m excited to take this cute little notebook with me on my everyday adventures! There’s often a time when I need a notepad to write down a quick note, make a list of something, or maybe even to do some memory keeping. And I don’t always carry my planner with me, since it’s quite chunky. So I think this is going to be an awesome little book! Happy Planning,

-Michelle