Andrea's "December Dreams" Holiday Planner Set-up

Hello there everyone! It’s Andrea here, and today I want to share with you a fun planner set-up using the new "December Dreams" collection/kit!

I absolutely love setting up my planner for the holidays and since I start my holiday season in November (because I like to include my Thanksgiving plans in with my "holidays" stuff), I decided to go ahead and set up my planner using "December Dreams" now so that I could start getting things ready for my holiday-time!

I used the A5 decorative planner pages and punched them to go in my platinum Carpe Diem planner. For the front dashboard page, I used the Sugarplum Fairy planner page and added a clear transparency on top, and between the two sheets I sandwiched some of the matching sequins that come with the "Happily Ever After" kit version of "December Dreams." I did this so I could create a fun shaker page! I love shaker pages like this for my planner! They are easy to make, and all you have to do to close everything up is just stitch around the edges. I used a zig-zag stitch on my sewing machine and some red thread. I think this dashboard came out really cute!

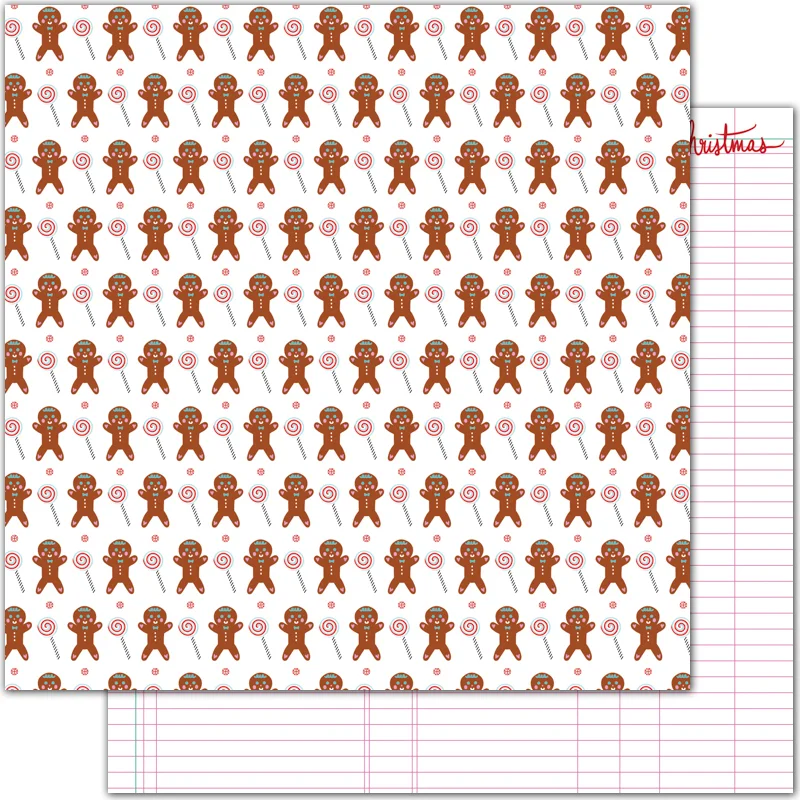
And to finish things off on my dashboard, I just added a little paperclip with a little label from the cut-apart sheet and some ephemera pieces (like the gingerbread man, the word "merry," and a little peppermint) to it on the bottom right corner. This just adds a cute, extra jolly detail!

For the pockets in the front of my planner, I just used different 3x4 cards from the cut-apart sheet and placed them here and there to my liking, and then I also added in some of the smaller cut-apart pieces as well as some pretty die-cuts from the ephemera pack. I added a few paperclips to keep things in place how I wanted, and also to add some more dimension and texture.

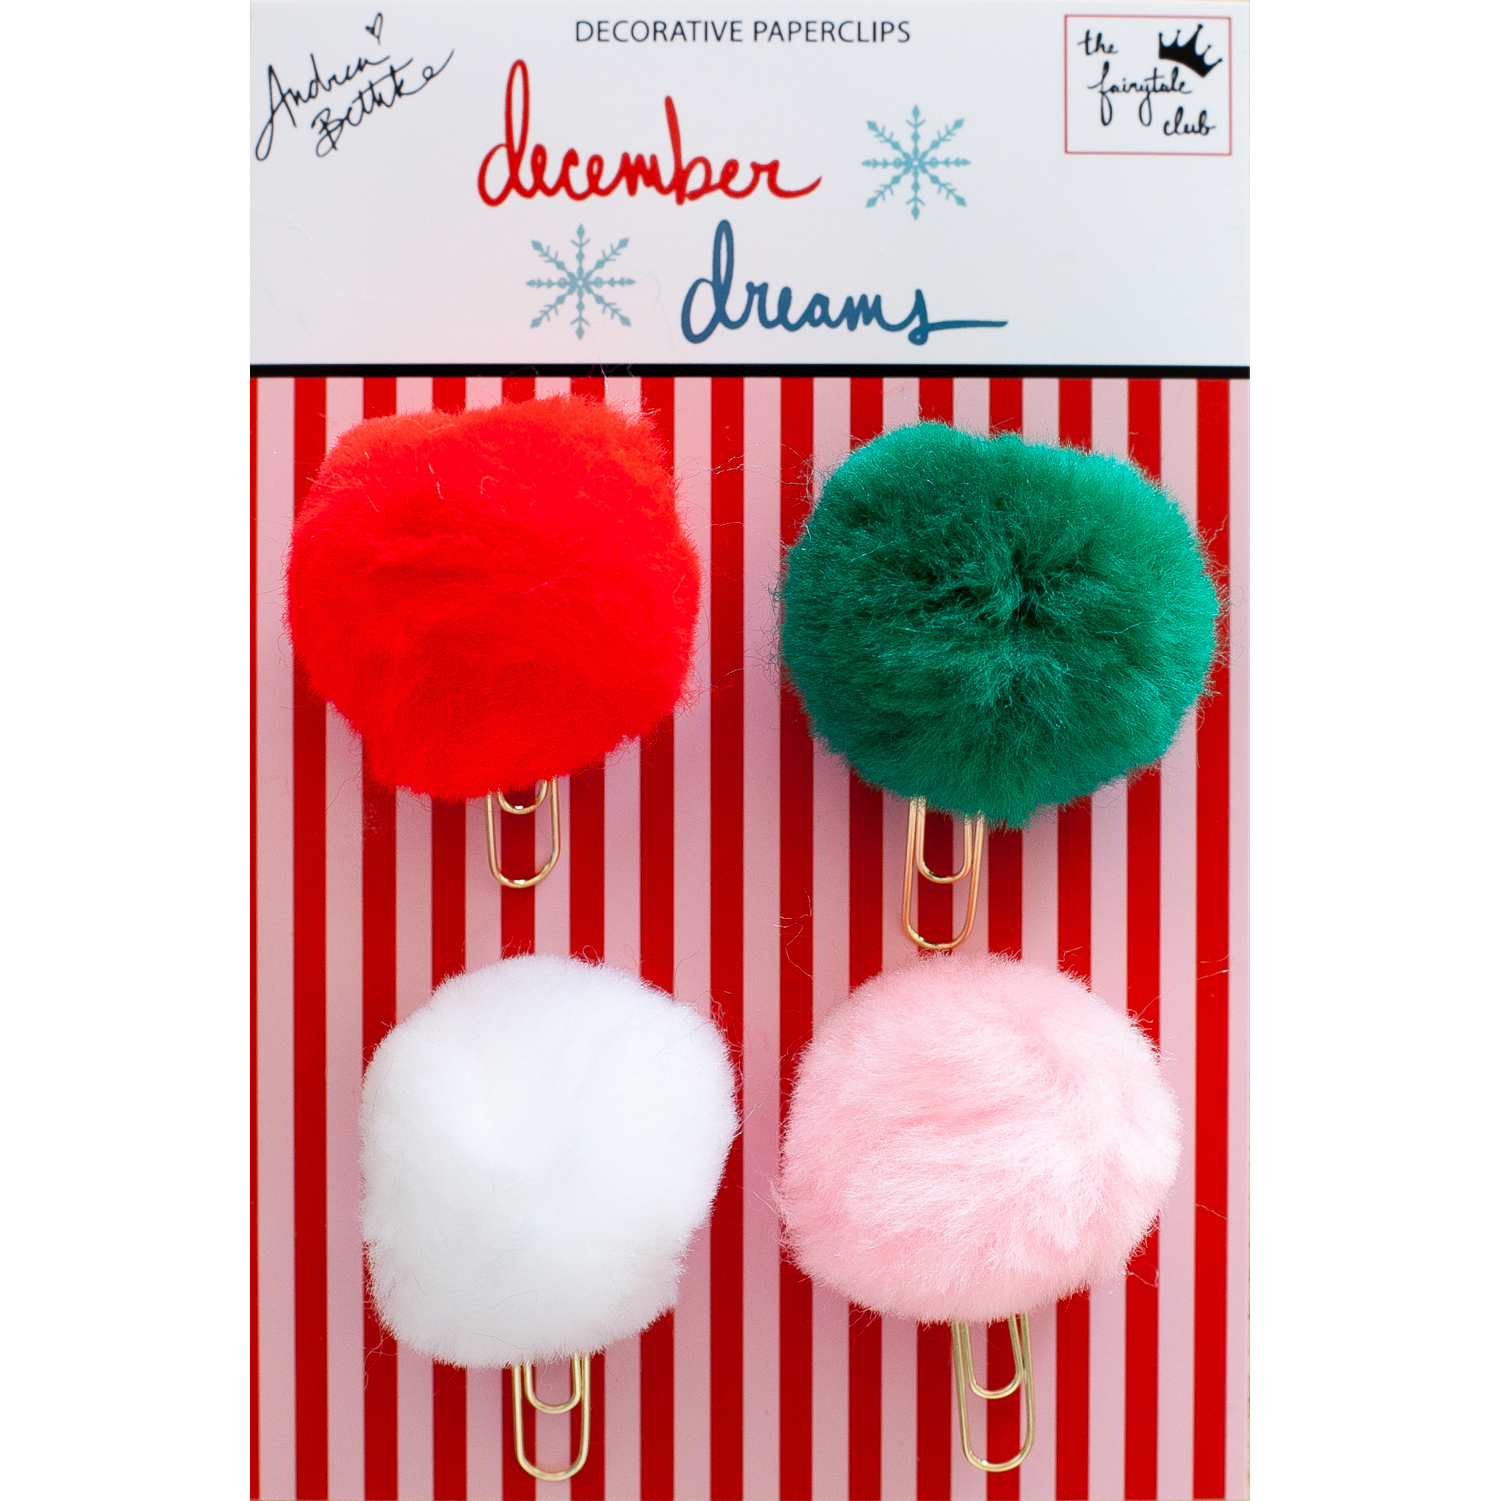
For added depth, I placed a decorative pink pom-pom paperclip at the top (from our decorative paperclips pack) and I also created a few of my own decorative paperclips by attaching some of the adorable flair that comes in the collection to some simple gold paperclips.

And for some extra glitz and glam, I added in the big glitter-snowflake that comes in the variety pack to the front bottom pocket...and I added in the little silver snowflake charm to one of the top pockets as well...so cute!

There are more decorative pom-pom paperclips as well as some of the flair paperclips that I made added here and there in my planner, marking different pages. They are all along to top and you can see from the front how they look like pretty tabs...choose one to turn to particular and important pages in my planner.

And finally, I added to the rings the beautiful gold key to the four realms that comes in our new variety pack. It looks so gorgeous and special! I added a December 25 tag from one of our cut-apart sheets to it by just threading it through the pink tassel that comes with the key and I also created a little snowflake charm dangle using a gold paperclip and one of the clear crystal snowflake beads that comes in the variety pack too!

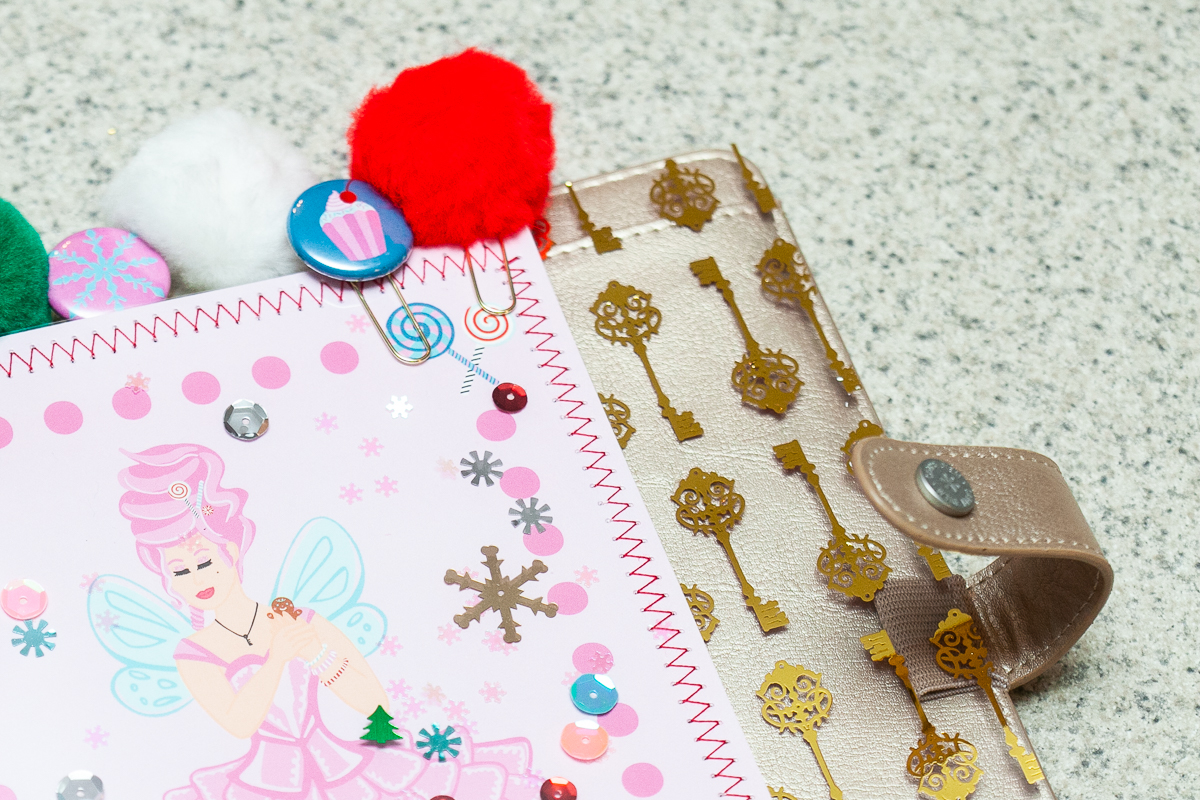
And for a last and lovely touch, I placed the gold key transparency sheet in the back of my planner...just because I think it looks so cool and magical!

Alright, I hope you like how I setup my planner for this holiday season and that I gave you some good tips, tricks and ideas for your planner set up (or maybe for a Christmas mini album, or a December Daily)! Hope you all are having a happy holiday-time!!! Hugs and remember to live your life as a fairytale (especially during this magical time of year)!

-- Andrea

Founder/Creator/Owner of The Fairytale Club :-)

Adeline's Halloween Planner Setup

Hi my fairy friend,

It's Adeline today for the blog, I'm happy to see you again for a bootiful post!!! As I said in my last post, Autumn is my favorite season, and I really love Halloween. I think that Andrea's Halloween themes are the best!!!! Magical and Mischievous is a good witch theme. I love the design, the colors, EVERYTHING!!! I knew this kit would be perfect for my new purple holographic planner from Kikki K, so I made my setup with it.

Magical 1.jpeg

I tried to create a girly magic halloween atmosphere, for that I decided to accentuate the effects with different items from the kit.

First I made my inside cover decor with the blue pumpkin. She is so pretty, and I added so much ephemera, like Halloween candy corn, the pretty witch...finally I added the pom-pom paper clips (I love them so much!!).

Regarding my dashboard, I decided to do it in three separate parts. For the first part I just cut my insert from a sheet of paper decorated with pretty witches. I punched it and integrated it into my planner, and it was the base of my dashboard. Its decoration is very simple - I just glued a ribbon of pom poms onto it.

For the second part of the dashboard, I have my insert with spiderweb acetate, and I chose the purple side of it. I punched it and integrated it into the planner without decorating it. This step will come at the end.

Magical 4.jpeg

For the third part of my dashboard I chose a project life card that I cut and punched. And finally I decorated it with kit ephemera and some crystals in the colors of the kit.

And then, I came back to the second part of my dashboard, the acetate sheet, to which I added decorations suited to the project life card that was added on to it so that everything was harmonious.

Then I chose some pumpkins and the poisoned love apple that I love and the perfect silver foil words "Happy Halloween". Also I made a little cat paper clip with a super cute "Magical and Mischevious" ephemera.

I hope you enjoyed my planner set up with this bootiful kit.

Kiss from France,

Adeline

Laura's October Daily

Hello everyone, it's Laura here to share some pages from my October Daily project that I've been working on. I've been having some health challenges this month, and one of the ways I've simplified my scrapbooking is by downsizing. I'm using a 4x4 mini album, and I love that Andrea's kit works for this size too.

To start the month, I folded down one of the calendar dividers and cut a slit in the side so it could fold up into my album. The smaller planner divider size works well in 4x4 albums this way.

I've been especially enjoying using the die cut packs that came with the kit. Sprinkled throughout my album, they give the whole thing consistency. I also like using the B side of the planner pages as simple patterns for journaling or backgrounds.

On this page I've used one of the planner dividers, cut it down, and used the lines for journaling about a special trip to the pumpkin patch. I also love how the pompom paperclip peeks through from the next page. Those might be my favorite part of the whole kit! For me, albums this size are a great chance to play with layers and pages outside the page protector.

Thanks to Andrea for creating such a versatile and beautiful October kit! And I hope you all are having a wonderful October!

Kellie's 6x8 Halloween Layout 2: The Spookquel

Kellie here with you today to share a layout I created using the Magical and Mischievous kit that I love to bits! This kit truly has everything and not just for your Halloween crafts as I've shown as we don't celebrate it down here in Australia, per se

2018-10-28 10.46.57.jpg

I feel that using a white cardstock background works so well to then add as much colour as you like. I scrapbook in the 6x8 size. Snap chat to the rescue for a photo and in black and white which, again, makes using colour even better.

2018-10-29 11.09.46.jpg

Layering in a layout is my favourite thing to do. Often I have to stop myself from layering too much, if there is such a thing! I've used the 12 x 12 pattern papers from the kit and with the ephemera also.

2018-10-29 11.09.59.jpg

I've used the acetate web sheet also on the silver side as the other side is purple, which is awesome to have two different colours.

I'm really happy with the end result, and after two layouts, two cards, and a mini album layout, I still have enough of the kit left over for so much more spooky crafting! What are you going to create with your kit?

Kat's Halloween Banner

Hello Spooky Friends!

Kat again! Bringing you my third project using the “Magical and Mischievous” collection. It’s been soo much fun playing with this super cute collection and I’m sad my short residency has come to an end, BUT I’ve had so much fun with you all! Ok ok enough chatter! Lol! Are you ready?! (*que drumroll) for my final project I decided to create a banner!

image1.jpg

OMG! I adore how it turned out! Squuuuueeeeee isn’t it the cutest?! I seriously went ham with the ephemera, but I just love how it looks! For each pendant I created a little cluster of Pastelloween heaven.

I used chipboard as the base of my pendants to create a strong and sturdy surface. I cut out pendants from each of the papers from the collection and sewed around the edges with black thread prior to gluing them to my boards.

I paired the collection with some paper roses, black spiderwebs, and black doilies. By using these elements along with the sewing, it adds more whimsy to the finished piece and creates a variation in textures.

I used a combination of foam squares and liquid adhesive to adhere all my elements to my pendants. After everything dried, I hole punched my pendants and strung it on some black and gold twine.

To create my clusters, I used a combination of all the elements from the “Magical and Mischievous” including the oh so cute flare buttons! I made sure each pendant had similar touches to create cohesion throughout my entire project. As you can see, each pendant has a button and some fun foil ephemera pieces.

Don’t be afraid to trim down or fussy cut some of the elements of the collection to create your own shapes and modifications to fit your project. I fussy cut several of the journaling card to create large focal pieces for my banner (the owl as an example). Thank you so much for graciously having me as your guest inspirer for the spookiest time of the year. I hope you all have a very fun and safe Halloween. Stay Spooky cuties!

– Boos and Shrieks ~ Kat

Lilly's Halloween Rosettes

Hey guys welcome back to the blog.. Are you guys ready for Halloween? I have really been enjoying creating Spooky mail. Today I’m sharing these super cute rosettes I made with the “Magical and Mischievous” kit.

I am totally obsessed because they combine a traditional look with that of “pasteloween,” which is super popular this year. I used the Tim Holtz rosette die. It’s my fave at the moment.

Also added some cute little spiders for a little something extra 🧡

You can either share these in happy mail or add them to projects or even make wands out of them.

IMG_4912.jpg

Well that’s all for now. Hope you guys have a great Halloween with friends and family! And always remember to stay safe 🎃

Solange's Magical and Mischievous Gift Wrapping

Hey guys! Solange here to show you a fun and unique way to wrap gifts using the “Magical and Mischievous” kit.

All you’ll need for this project is your gift and the kit, that’s it ! Easy, fun and super cute way to send someone a present.

image3.jpg

To start, wrap your gift with a 12x12 patterned paper of your choice then just have fun decorating using the ephemera pieces and fussy cutting images from the papers or dashboards like I did!

I always try to embellish the gift using the same images that are in the paper in a bigger scale so I fussy cut the spooky owl from one of the dashboards to match the background, giving it a fun cohesive look!

You can also add ribbons, trims and tassels to make it even more fun!

image5.jpg

I hope you got some inspiration and I can’t wait to see what you’ll create!

Carolee's Traveler's Notebook "Magical and Mischievous" Layout

Hey everyone! Carolee here with a new traveler’s notebook layout for you today using the new Magical and Mischievous kit Andrea created for Halloween!

My hubby and I took a quick afternoon trip to Disneyland to check out all of the decorations and Halloween items in the shops. We found this adorable popcorn bucket and picked one up. This picture makes me giggle. Someone told me that Ryan looks like he’s trying to get someone to try the poison inside! So, I figured using the Magical and Mischievous banner would work great as a title on this layout!

First up, I cut a piece of paper down so that I had two TN-sized sheets. Next up, I wanted to layer several papers underneath the Instax photo I printed. I love using the A5 inserts for this since the patterns are a bit smaller. I added a touch of pink as the mat and then haphazardly cut a bit of purple to go under that. Last, I added the title banner and glued it down to the page.

The cauldron square from the Hello October paper couldn’t have been more perfect so that went opposite the picture. I just glued that down and added a couple of staples to add a bit of gold to the layout.

Next, I wanted to add some orange. I used the pumpkin bucket die cut but while I was looking through, I saw the poison apple so I added that in there as well. Finally, I added some of the sequin mix to the page to add color and shine to the whole thing. I really like how well this quick and easy layout came together. I hope you have as much fun with the collection. Until next time, happy crafting!