Aimee's "I'm in Wonderland!" 8.5x11 Layout

Hey everyone, it’s Aimee and I am so excited to be back today sharing a project using the “I’m in Wonderland!” Kit.

im in wonderland.png

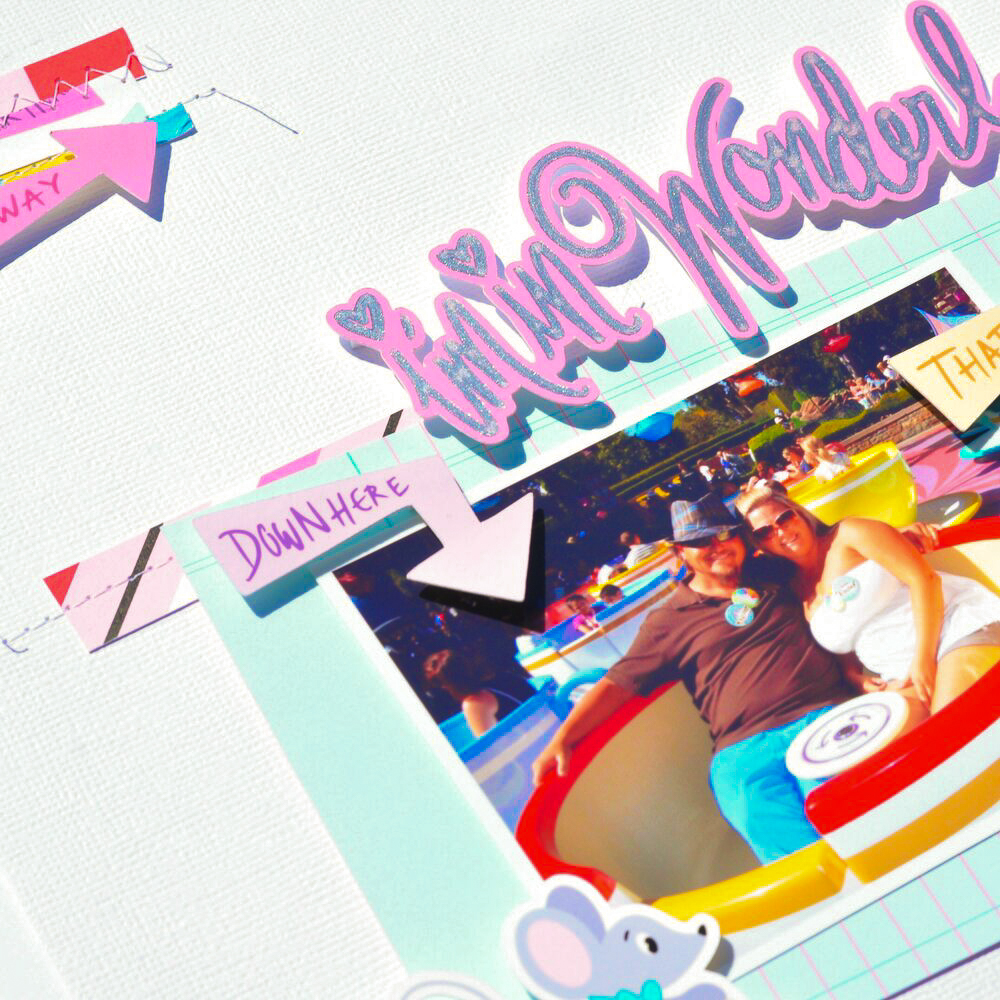
When this kit arrived, I just knew I would be scrapping photos from my husband’s birthday at Disneyland. This was our very first trip to Disney together. I took him there for his 38th birthday, and he was such a great sport letting me take ALL the Pictures! This was back in 2009 and you could get in free on your birthday!

ACS_0919.jpg

How perfect is this photo of us riding the tea cups!

I used one of the smaller planner dividers to mat my photo. I cut the bottom strip from “I’m in Wonderland” and machine stitched it under my matted photo. I adhered the matted photo on top of those strips to give a bit of depth and wonkiness {that’s a word, right?}.

ACS_0920.JPG

Using the arrow die cuts and the cute little mouse in the tea cups, I adhered them over my photo with 3-d adhesive foam.

I used the “I’m in Wonderland” die cut from the Variety Pack as my title, and adhered it with 3-d foam. Check out how the metallic title shines in the sunlight!

ACS_0922.jpg

I stamped the bottom right side of my layout with a date roller stamp and another roller stamp

I have that this collection has Disney-inspired phrases.

ACS_0918.JPG

For the top left corner {to balance out the layout} I cut the strip from the bottom of 2 other 12x12 papers and machined stitched. I then added a little tiny paper clip and slipped in the bow die cut. I adhered another die cut arrow over the stitched strips with 3-d foam adhesive for another “POP”

ACS_0921.jpg

It was so great to create for you all again, I can’t wait to share my next project with you!!!

ACS_0917.jpg

 XOXO, Aimee

Kellie's Quick and Easy Cardmaking with "I'm in Wonderland!"

2019-09-06 14.07.27"We're all mad here..." has to be one of my favourite quotes of all time.  I think it nails my family, haha.  Today I'm here to share a quick card I made using the new "I'm in Wonderland!" kit.  This kit has everything you could need to create MANY cards if that's your thing.  So far I've created three different projects and still have enough kit to keep going on more.2019-09-06 14.07.27For this card I kept it simple.  I love that I now have a collection from previous cards made in the same form.  I could give them away, but I'm hoarding them, haha.  I absolutely love the strip along the bottom of each 12 x 12 pattern papers that come within the kits from The Fairytale Club.  Every time I have used them to create a card like this one.

I love how this card came together and the flower just goes with the flow of all the bright colourful patterns.

Do you like making cards?  Do you still send cards or happy mail?

Lilly's "Wonderland" Memorydex Cards

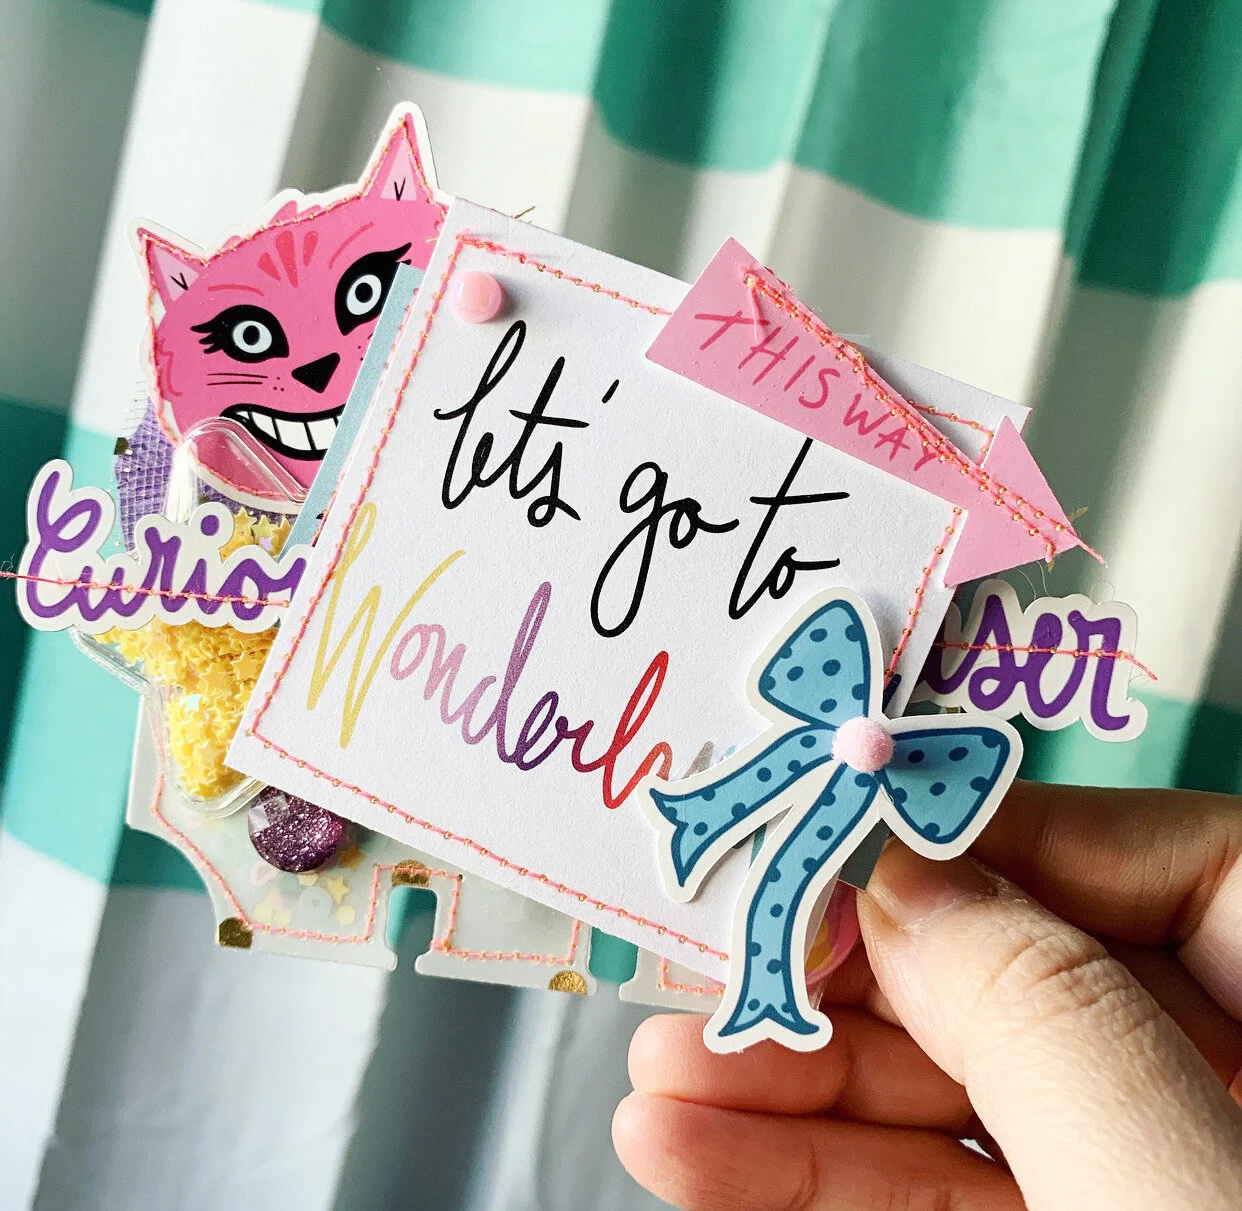
Hey guys, welcome back to the blog! Hope everyone is having a great week. Today I’m sharing with you guys some fun vellum shaker memorydex cards i created using the new "I’m in Wonderland!" collection.

IMG_4106.jpg

These are super easy and fun to create for pen pals in happy mail or just to collect in your own crafty stash. I stitched up the cards to create my shaker with some pink neon thread. Then, you guys, it was time to decorate and make these cuties nice and chunky filled with layers!

I used a bunch of the cut aparts and ephemera to add all sorts of details to these cards. The key to layering is to not think just add. Trust that in the end the finished product will look amazing. I think they turned out great and can’t wait to share these with my crafty friends. What do you think? Thanks for stopping by. Until next time… Stay Crafty!!!

Kellie's "I'm in Wonderland" layout

2019-09-06 14.05.33Hi there crafty peeps, long time, no layout!  We've just gotten over winter down my way and into Spring, well I mean almost, I'm sure Spring is coming.  So this is why it was amazing to have this kit arrive on my doorstep with all the bright beautiful colours and loads of floral.  Any guesses on the theme?!  I'm in Wonderland!
2019-09-06 14.05.33I scrap in the 6x8 size in case you are new around here.  I used to only scrap in 12x12 many moons ago.  I'm not even sure I could managed that now?!  Maybe a challenge for myself for this weekend with this very kit.  Now I'm scaring myself, haha!
2019-09-06 14.05.33I really LOVE all the patterns in this release and it made it hard to just pick a couple or a few and so I made strips and got busy layering and LOVED putting it together for the background.  After that it was just a case of layering, layering and more layering
2019-09-06 14.05.33What's your favourite part of the I'm in Wonderland kit?

Lilly's "I'm in Wonderland!" Handmade Cards

Hey guys, welcome back to the blog! I recently got the chance to play with the new “I’m in Wonderland!” collection.

I, of course, chose to make some handmade cards as my 1st project because I think Andrea’s collections are perfect for cards.

I love the brightness of the cards. I feel like these cards are great to send to a friend who needs a smile.

To create the cards I used 110lb white cardstock as my base. I matted the cards with the 12x12 sheets from the collection.

I did tons of stitching and added texture to each card with small embellishments from my stash. I love how with a little fold, stitch and doily you can transform the look of any project.

This is a great collection to work with and I can’t wait till I show you guys what I create next. Thanks for stopping by, and I’ll see you guys next time. Happy Crafting!!!

Aimee's "Frame It" Layout

Hey everyone, it’s Aimee!

 Today I have an 8.5x11 layout for you!

frame it.jpg

 Do you ever have an idea for a layout and then you make and it doesn’t turn out how you thought? Well I do that ALL the time. But this layout I ended up LOVING.

2.jpg

 When I started this layout that’s exactly what happened. I instantly knew when I saw the “Be True to You” 12x12 Paper, that I wanted to frame little photos in all the frames. And that’s exactly what I did.

3.jpg

 First, I cut the 12x12 paper down to 8.5x11 {that’s my go to size for layouts these days}. I then used an Xacto knife to cut out the frames that were still whole, so I could back them with photos.

 I measured and printed 7 little photos, and backed my paper with said photos. And the layout was moving right along just the way I wanted. But I knew it needed dimension. SO, I decided to use puffy alphas to write stuff in the frames, AND I just didn’t like it. Now what?

4.jpg

 I grabbed the Variety Pack and pulled out 4 of the color blocked hearts, and stapled them inside frames.

Ok now the layout is coming along, but I need more.

I am not a huge sticker user. I love them, I just don’t use them very often. I got the sticker sheet out and started putting the word strips and hearts and stars in the frames. And guess what.

 I LOVE IT.

I simply dated the layout with a date roller stamp and used some glitter glue on some of the frames.

5.jpg

 Now I was hoping you wouldn’t notice but I have to come clean. My paper is upside down.

Yep that’s right. See the squiggly frames? They have hearts in them and they are upside down. Oopsie! Once I noticed it was too late and I just went with it!

Have you ever noticed a boo boo in the middle of a layout and just kept going???

XOXO Aimee

Aimee's "Beautiful Dreamer" Mini

Hey FTC fans, it’s Aimee!

beautiful dreamer mini.jpg

Today I am sharing a mini tag album that is ALL about me!

ACS_0810.jpg

The Beautiful Dreamer Kit totally inspired me to make a little mini about me.

I mean it’s totally obvious why right??? She’s blonde and she sleeps, that describes me to the T.

3.jpg
4.jpg
5.jpg
6.jpg

 I started this album by cutting the 2, 12x12 papers with 3x4 pocket cards, “Make it Pink, Make it Blue” and “Nap Queen”.

7.jpg
ACS_0816.jpg
8.jpg

I then printed 8 photos of myself using my instax share printer.

9.jpg
10.jpg

I then choose 8 of the different cards that went best with my photos, and of course I used the tags too.

11.jpg
12.jpg

For my photos I used some Bookmark Tags from Pretty Little Studio {limited availability} as the base.

13.jpg
14.jpg
15.jpg

I embellished my photos and tags using die cuts from the variety pack and stickers from the sticker sheet.

16.jpg
17.jpg

I also labeled my photos with the date by printing on to white cardstock and cutting tiny strips.

18.jpg

I finished embellishing with my tiny stapler and other bits from my stash.

19.jpg

 I put all the tags and cards onto a painted binder ring and also used some charms and a tassel from my stash to give it more pop.

20.jpg

 I love that I finally made a little album just about me!

Do you ever make projects just about yourself???

XOXO Aimee

Kellie's "Beautiful Dreamer" Happy Mail Pocket

2019-08-02 12.02.26I wasn't lying!  Hi again crafty peeps, Kellie here with you again for another happy mail pocket only this time I've used the gorgeous kit, Beautiful Dreamer.  This kit, just stunning.
2019-08-02 12.02.26In case you missed this the first time, I followed the youtube video from the very creative @iamabsolutelyalice which was super duper simple to follow along with.⁠
2019-08-02 12.02.26The fun part about this is decorating back and front of the tags.
2019-08-02 12.02.26Again I'm so happy with the result and how these all came together.